The 2500 has an automatic algorithm for selecting a "correct" color temperature. Of course, if it is necessary, you can overwrite this automatic capability by choosing a particular color temperature you wish to use. However, it can only be done in the M mode. The 2500 divides the color temperature into the following white balance modes: (1) automatic, (2) fine (i.e., sunny), (3) incandescent light, (4) fluorescent light, (5) cloudy, (6) speedlight (i.e., flash), and (7) white balance preset. The automatic mode lets the camera to find the "best" possible white balance. This is a very convenient mode and would be correct for most situations. The last is the most flexible one because we can tell the in-camera algorithm what the white color looks like under the current lighting situation. If you are not satisfied with your result in the auto or other modes, give this one a try. All the other modes have their usual meaning and do not require further explanation.
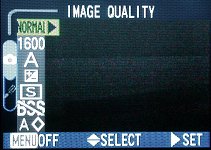
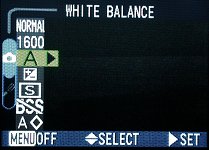
In the M mode, press the MENU button and the following M mode menu appears:
Then, press the down arrow of the multi-selector to highlight the third item. If this is the first time you set white balance, the third item should display an A, indicating the camera is in the automatic white balance mode:
Press the right arrow of the multi-selector to select this item. The white balance menu appears:
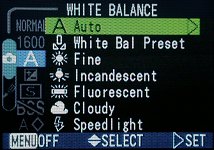
This menu displays seven items:
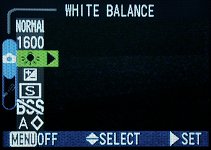
If a white balance mode cannot deliver a desired result, you can use the White Bal Preset (i.e., white balance preset) mode. The white balance preset mode permits us to tell the camera what the white color should look like in the image under the current lighting condition. This mode can help us determine a correct color temperature under some difficult situations. What we have to do is showing to the camera a white paper so that the camera sensor can read off the color temperature information from it and setup the camera's white balance algorithm properly.
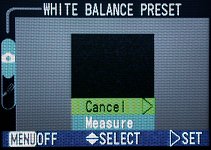
After selecting White Bal Preset, a new screen appears as shown in the left image below. There are two options: Cancel and Measure. If you do not wish to set white balance by yourself, select Cancel. Then, the screen returns to the M mode menu. However, the M mode menu will show the White Bal Preset icon. Therefore, you must go through the white balance selection procedure again to set the white balance mode back to the original. This may be a careless firmware error.
|
|
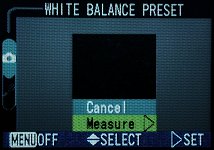
If you do wish to set white balance by yourself, put a white or light gray paper/object at a well-illuminated location, and point the camera to the white paper so that the image of the white paper completely covers the small square on the LCD monitor without shadow. Then, select the Measure option. It will take a short moment for the camera to adjust itself. Once this is done, the M mode menu reappear, and you can press the MENU button to return to shooting mode. In all subsequent shooting, the camera will use the "memorized" white color to set its color temperature until it is reset it.