|
|
|
|
|
Note that turning the camera off cancels auto bracketing..
In many situations, we have only one chance to capture the scene. Hence, this photo-taking activity cannot fail. Composition can be verified with the LCD monitor; but, in general, exposure will not be so precise even with the help of the LCD monitor. That is, subtle details may not be seen on the small LCD monitor. What we frequently do is to take a number of shots of the same scene, each of which has a slightly different (aperture, shutter speed) combination so that, hopefully, one of them would show all the details with a "perfect" exposure.
Normally, we use a base (aperture, shutter speed) combination, take a shot, increase and/or decrease the exposure with exposure compensation, take another shot, and so on. This is a tedious procedure, and auto bracketing is designed to automate this process.
With 990, once a (aperture, shutter speed) combination is selected and auto bracketing is activated, you will be able to take five photos in a batch. The first image has a compensation of +2/3 stop, the second has a compensation of +1/3 stop, followed by 0 stop (the exposure you selected), -1/3 stop, and -2/3 stop. If the original (aperture, shutter speed) combination is reasonable, hopefully, one of these five could be exposed perfectly.
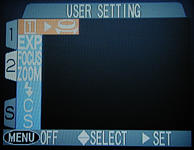
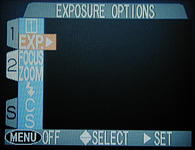
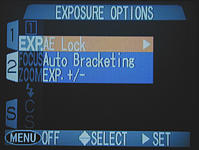
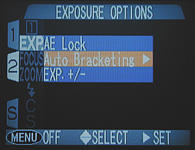
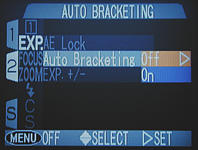
To activate auto bracketing, follow the procedure below:
|
|
|
|
|
|
|
|
Note that turning the camera off cancels auto bracketing..
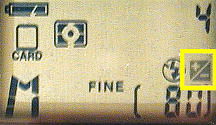
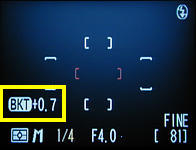
After activating auto bracketing, you will see a blinking +/- sign on the control panel and BKT+0.7 on the LCD monitor. The number after BKT (i.e., +0.7) indicates the compensation to be applied to the next shot.
|
|
| Control Panel | LCD monitor |
There are five shots in a single batch. That is, the compensation to be applied automatically are, in this order, +0.7 stop, +0.3 stop, 0 stop, -0.3 stop, and -0.7 stop. More precisely, the compensation starts with +0.7 and decreases in 1/3 stop for each exposure. Each time you press the shutter release button to take a photo, the current displayed compensation is used and the next level compensation is displayed. As a result, you have five shots in a batch. After these five shots are taken, the bracket display returns to +0.7 for you to start the next batch.
Because of this setup, to cancel auto bracketing, you need to reset it by going through the above discussed procedure or turn off the camera.
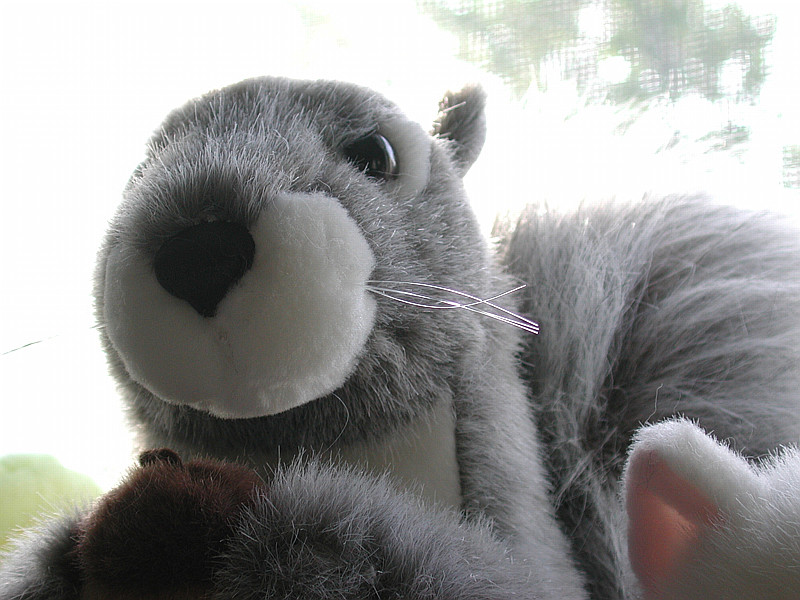
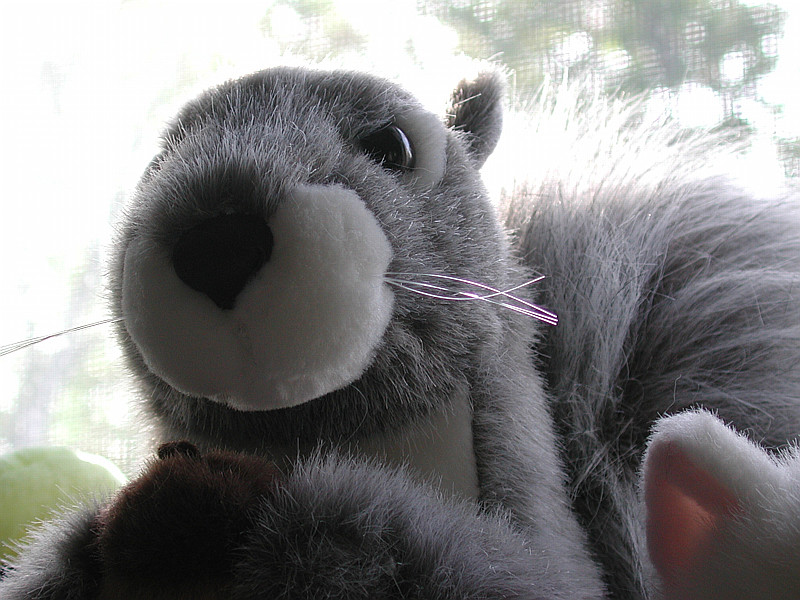
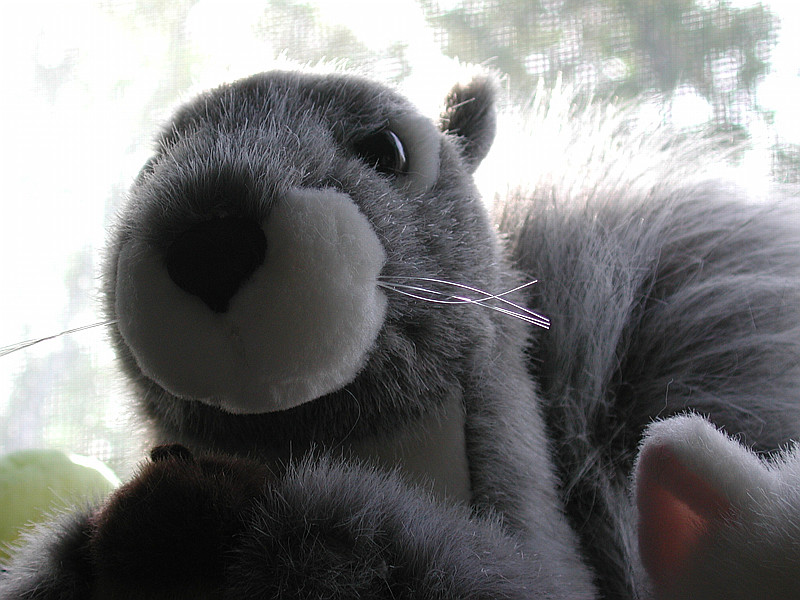
The following shows a sequence of shots that illustrates the effect of auto bracketing. Backlit is a difficult lighting situation and may fool the camera exposure meter. A scene with very complex lighting is another challenging situation. In these cases, auto bracketing provides an easy way of overcoming this problem. The image taken with BKT 0 is darker than the actual color. This is because the background is much brighter than the main subject, and the camera exposure meter is fooled to believe that the scene is brighter. Therefore, the image is slightly under-exposed. With the auto bracketing capability in hand, we can take five shots in a row with an automatic exposure compensation from +2/3 stop down to -2/3 stop. In the images below, the one taken with BKT+0.7 delivers an image with a tonality close to the real subject.
|
|
|
| BKT+0.7 | BKT+0.3 | BKT 0 |

|

|
|
| BKT-0.3 | BKT-0.7 | |
| Click on the image to see a larger one | ||
Note that sometimes a exposure compensation is necessary before using auto bracket. This is because the "ideal" exposure could be more than 2/3 stop away from the one chosen by the camera exposure meter.
A Number of Important NotesThe following notes are important to the use of auto bracketing.
|