There are two ways to playback your work: the Quick Review mode and the Playback mode.
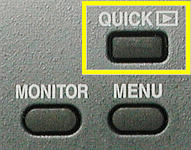
When the camera is in the A-REC or M-REC shooting mode, press the QUICK button (see the image below) to enter the quick review mode:
Initially, the last image on the memory card is shown in the upper-left corner - quarter screen display (left image below). The four arrow of the multi-selector can be used to browse the images on the memory card. More precisely, pressing the left and up arrows moves to the previous image, and pressing the right and down arrows moves to the next one. The camera returns to the shooting mode, if one of the following operations is taken:
|
|
| Quarter screen | Full screen |
There are a number of important notes:
To playback your work, turn the mode dial to the PLAY position.
Then, the last image you took appears on the LCD monitor. At this point, you have two choices: (1) view one image at a time (single-image playback), or (2) view thumbnails (thumbnail playback). The single-image playback displays the images one by one, while the thumbnail playback displays the images in a 3×3 or 2×2 thumbnail format.
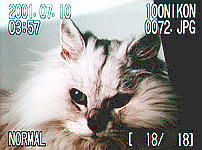
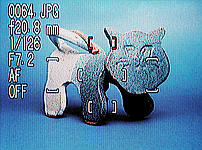
When the mode dial is turned to PLAY, the last taken image will be displayed on the LCD monitor along with some information:
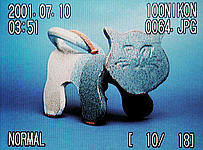
The bottom row indicates the resolution and the image number. In the image, the resolution is NORMAL and the image being shown is the tenth out of total eighteen images. The numbers in the bracket are of form [m/n], which means there are n images in total and the one being shown is the m-th one. The upper left corner shows the date (2001.07.10) and time (03:51) when the image was taken, and the upper right corner shows the folder name (100NIKON) and file name (0064.JPG) of this image. Note that there are a number of different formats for showing the date information. Please refer to Setting Date and Time for the details.
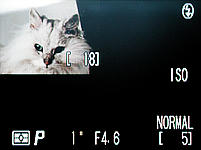
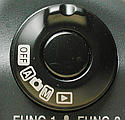
In addition to this first screen, we can turn the command dial (image above) to see more information of the image on the monitor:
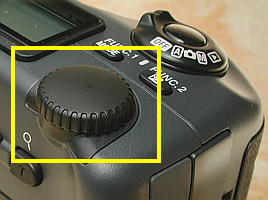
There are four more screens. Turning the command dial counter-clockwise will display these four as shown below. Turning it clockwise reverses the order of display.
| 
|
| (2) | (3) |
| 
|
| (4) | (5) |
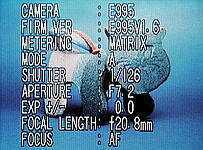
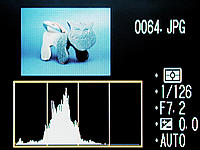
Images (2) and (3) above display the exposure parameters used for taking the image; image (4) has a very useful histogram, and image (5) even includes the focus area (i.e., the pair of dark bracket). Once you see the image (5), turning the command dial again will bring the screen back to the first image shown earlier.
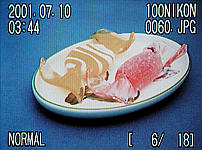
Note that the over-exposed areas are shown with blinking black-white spots. In the right image below, the yellow frame indicates a number of over-exposed areas in the image.
| 
|
You can press the MONITOR button to remove these information from the monitor. Press the MONITOR again to turn off the monitor. Then, press the MONITOR button to display the image information.
When the camera enters the playback mode by turning the mode dial to PLAY, the camera always displays the last taken image. Using the left or up arrow of the multi-selector to browse backward, and the right or down arrow to browse forward. Going backward (resp., forward) when the current image is the first (resp, last) one displays the last (resp., first) image. Thus, we can consider all images are organized in a circular order. More precisely, the next (resp., previous) image of the last (resp., image) is the first (resp., last) one.
There is a short cut for finding an image quickly. Press and hold an arrow of the multi-selector, the image number will scroll quickly. Once the arrow is released, the corresponding image is then displayed.
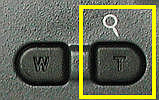
It is difficult to detect if the image just taken is an out of focus one because the LCD monitor is too small. Therefore, Coolpix 995 provides you with a magnifying or zooming-in capability. To perform zooming in, you need to use the zoom button T. Please note that there is a magnifying class above this button:
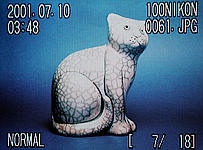
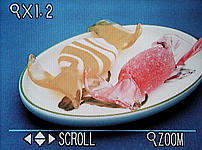
When an image is shown on the monitor, pressing the zoom button T to zoom in with magnifying ratio ranging from 1.2 to 6.0 with increment 0.2. Suppose the monitor is showing the following image:
|
| Original |
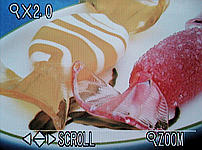
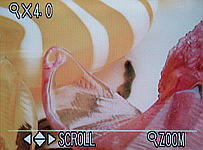
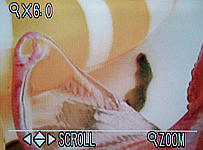
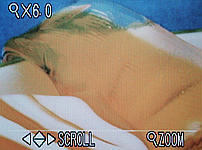
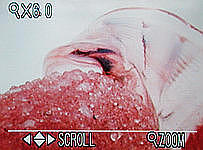
Press the T button to activate the magnifying process. Then, the monitor displays information as shown in the left image of the first row. The bottom part indicates that use zoom button T to zoom in and that use the four arrows of the multi-selector to scroll. The upper-left corner shows the zoom-in ratio. The first time the zoom button T is pressed, the zoom in ratio is 1.2 as shown. As the zoom button is pressed again, the ratio increases in a step size of 0.2 until it reaches 6.0. That is, the maximum zoom in ratio is 6. The other three images below show the effects of zoom-in ratio being 2.0, 4.0 and 6.0.
|
|
| 1.2x | 2x |
|
|
| 4x | 6x |
As the image is being magnified, some part of it will not fit into the monitor. To see these "hidden" areas, we need to use the four arrows of the multi-selector to scroll. That is, pressing the left, right, up and down arrow to scroll to the left, right, up and down, respectively. For example, the following images are obtained by pressing the left and up arrows to scroll the image to the upper-middle and upper-right corners.
|
|
| Upper-middle | Upper-right |
To return to normal display, press the zoom button W.
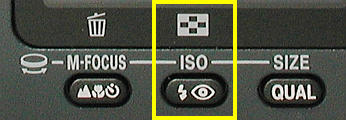
To delete an image, you have to display it on the monitor. Once the image you want to delete is shown, press the focus mode button. Note that in the PLAY mode, the bottom row of buttons serves a different purpose. As shown in the image below, the focus mode button now serves as a delete button as indicated by the trash can, while the flash mode button serves as a thumbnail display button.

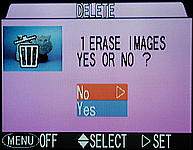
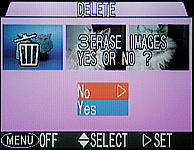
After pressing the delete button, the following screen appears indicating that one image is about to be erased. If you really want to delete that image, press the down arrow of the multi-selector to highlight Yes, followed by pressing the right arrow to make a selection. Then, the image is deleted, and the screen returns to normal display function. Otherwise, press the right arrow to cancel this delete operation.
After pressing the thumbnail button, the monitor shows a 3×3 grid of 9 thumbnails with the current image highlighted. See the left image below. Pressing the thumbnail button again changes the display to a 2×2 grid of thumbnails with the current image highlighted (the right image below). Then, pressing the thumbnail button again returns to the single-image playback mode (i.e., a 1×1 thumbnail). Note that the current image has a yellow frame.
|
|
| A 3×3 thumbnail | A 2×2 thumbnail |
There are two ways of browsing thumbnails. First, the left and right arrows move the highlighted thumbnail to the left and right (on the same row), respectively, while the up and down arrows move the highlighted thumbnail to the image above (resp., below) the current one (on the same column). Second, you can turn the command dial to scroll through thumbnails screen by screen (i.e., in a group of nine or four thumbnails at a time).
Deleting an image while browsing thumbnails is identical to that of browsing single image. First, highlight the image to be deleted, and press the delete button (i.e., focus mode button).
To delete all images of the current folder, press the MENU button while in the PLAY mode. The following menu appears:
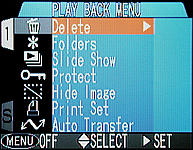
Press the right arrow of the multi-selector to select Delete. Then, the next menu appears (left image below). Use the down arrow to highlight the item All images (right image below).
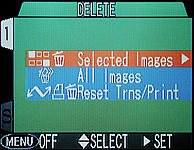
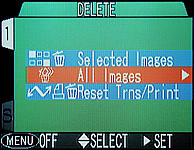
Use the right arrow to select it, and the following screen appears:
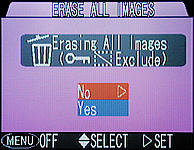
Again, use the down arrow to highlight Yes and use the right arrow to select. After this, all images in the current folder are erased.
What if you change your mind? Simple, press the MENU button (or press the right arrow when No is highlighted) and you will return to normal operation.
You can also delete a number of selected images in the same folder. To do so, press the MENU button while in the PLAY mode. The following menu appears:
Use the right arrow to select Delete and bring up the next menu:
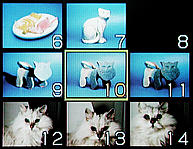
Now, the first item Selected Images appears. Use the right arrow to select it. Then, the monitor displays a 2×3 grid of small images like the thumbnail as shown in the left image below. Note that the current image has a yellow frame.
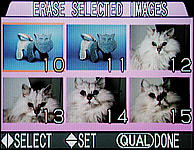
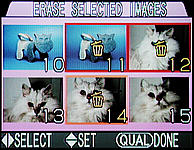
You can use the left or right arrow to browse and the command dial to scroll. Do not use the up and down arrows. To select images for deletion, move the highlight frame to an image and use the up or down arrow to select. Once an image is selected, a trash can icon appears in that image. Note that all selected images have red frames. Images 11, 12 and 14 are selected for deletion in the right image above. Once all images are selected, press the QUAL button. This brings up the next screen asking for your confirmation.
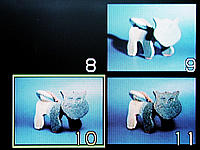
This screen displays at most six of all selected images, and asks you to confirm. If you really want to delete these selected images, use the down arrow to highlight Yes followed by the right arrow to select. Then, all selected images are erased. If you change your mind before selecting Yes, you can press the MENU button (or press the right arrow when No is highlighted) to return to normal operation.