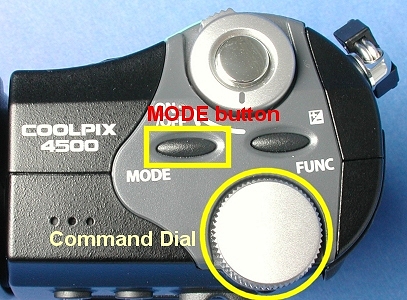
Under the program mode, the camera selects both the aperture and shutter speed. Consequently, you do not have to worry about exposure at all. To enter the Program mode, press and hold the MODE button and at the same time turn the command dial:

While the command dial is being turned, the letter in the lower-left corner of the LCD monitor changes. The possible letters are P, A, S and M for the program, aperture-priority, shutter-priority and manual exposure modes, respectively. Therefore, once P is shown on the monitor (see the next section), the camera is in the program mode and you can release the MODE button.
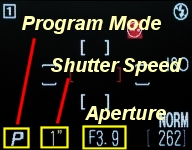
When the camera in the program mode, the lower-left corner of the monitor displays P. See images below.

The lower-left corner of the monitor also shows P, indicating the camera is in the program mode. Next to the letter P are the shutter speed and aperture selected by the camera. If autofocus area selection is not turned off (I recommend you do not turn it off as this is a very handy feature), the five autofocus area indicators are also shown (see images above), with the selected one in red. Note that if the selected shutter speed is longer than or equal to 1/4 second, it is shown in yellow on the monitor to indicate that noise may appear in the recorded image. Moreover, if the shutter speed is slower than 1/30 sec, the Camera Shake icon(i.e., a red palm ), will appear in the upper-right corner of the monitor. See the image below:
| |
| The Camera Shake Icon |
You can use Exposure Compensation to increase or decrease exposure.
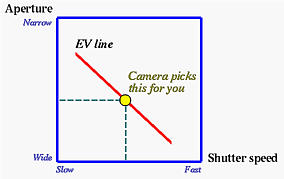
As discussed in Exposure Value: EV, when the shutter release button is pressed, the camera meter measures the illumination and determines an EV (i.e., exposure value). From this EV, the camera automatically selects a proper combination of (aperture, shutter speed). See the image below. However, if you believe the camera's selection is not suitable for your work, you can turn the command dial to enter the Flexible Program Mode for fine tuning the selection of (aperture,shutter speed).
