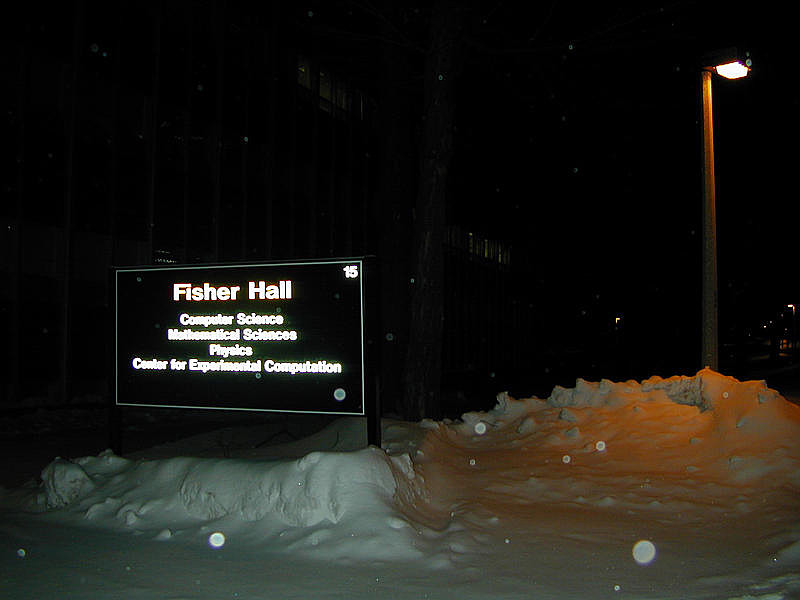
Since flash light is usually stronger than the surrounding ambient light, when you shoot with flash light in a low light environment, it is likely that only your main subjects are illuminated properly. The left image below was taken around midnight with flash on. The distance between the camera and the subject is about six yards. As a result, only the sign, which is reflexive, and the pole are visible.
|
|
| Without Slow Synchronization | With Slow Synchronization |
| Click on the image to see a larger one | |
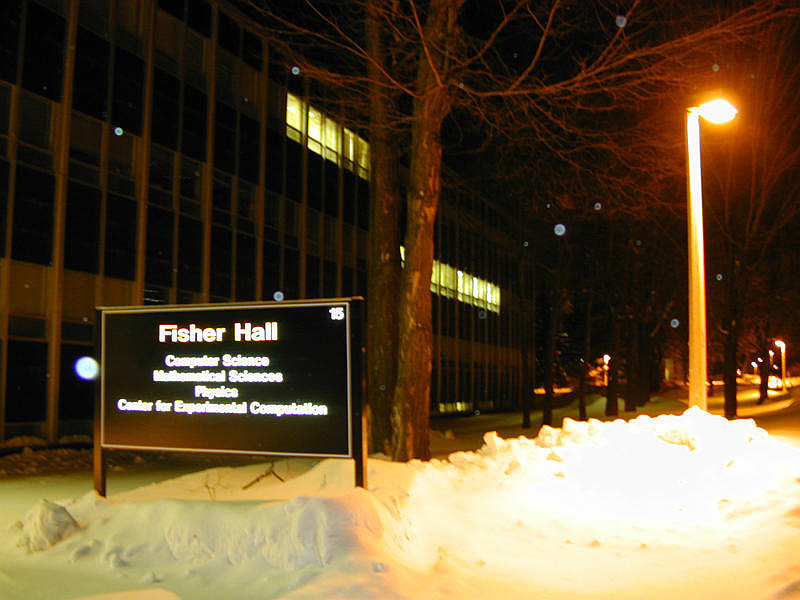
This problem can be overcome using slow synchronization. Slow synchronization means after the flash fires, the shutter stays open for a little longer. In this way, the flash light illuminates the main subjects and the slow shutter speed helps capture the ambient. The right image above shows the effect of slow synchronization. As you can see, the background pops up and the snow in the foreground looks more natural.
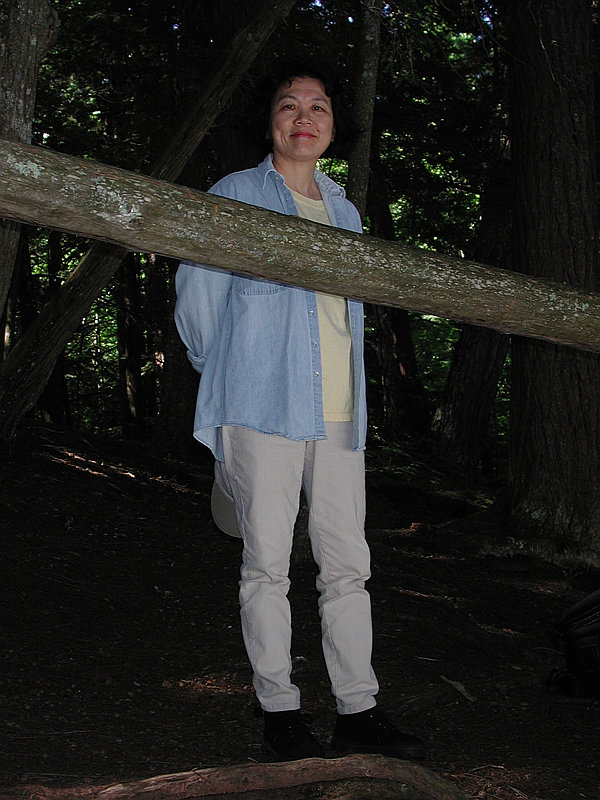
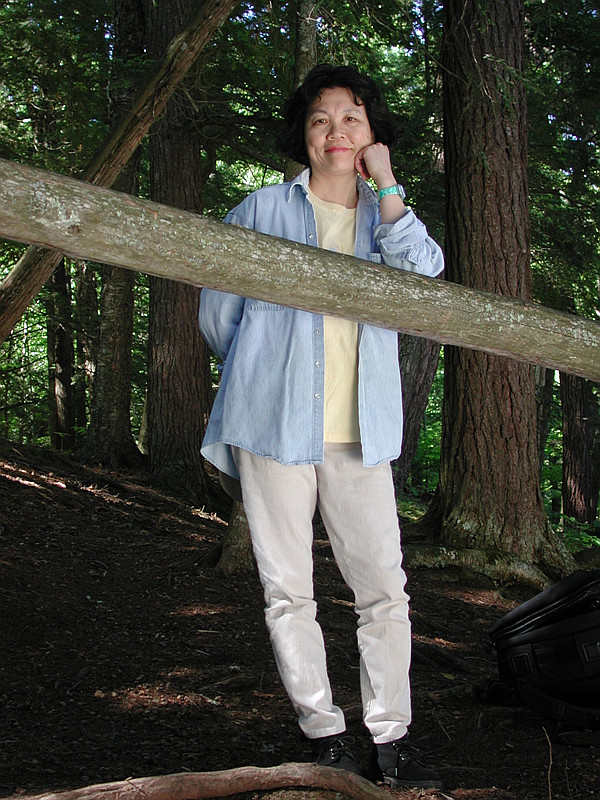
The following is another example. The left image was taken using the internal flash in a forest. Like the left image above, only the foreground and the main subject are illuminated. The right image was taken with slow synchronization turned on. As you can see, the background is also captured. Since the internal flash does not reach very far, the use of slow synchronization usually provide a way to produce images with better color saturation if subjects are near the end of the reach of the internal flash. The images below illustrate this well.
|
|
| Without Slow Synchronization | With Slow Synchronization |
| Click on the image to see a larger one | |
Slow synchronization can also make an image to look more natural. The left image below uses flash without slow synchronization. It does not look like the actual scene which should be warmer. With slow synchronization, we have the right image. Now, the foreground is illuminated by the flash, and the background, which is illuminated by a table-top lamp, becomes warmer and looks more natural.

|
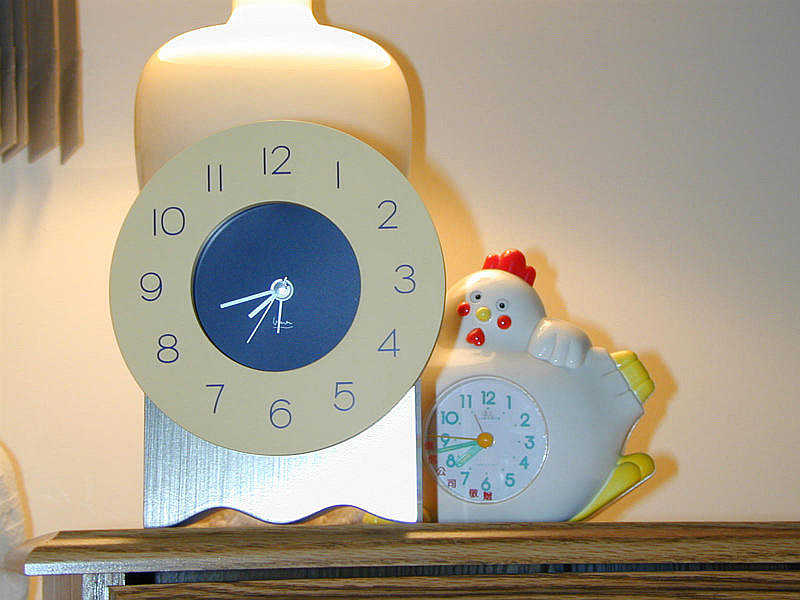
|
| Without Slow Synchronization | With Slow Synchronization |
| Click on the image to see a larger one | |
This slow synchronization feature is only available in the program (P) mode, aperture-priority (A) mode, shutter-priority (S)mode, and manual-exposure (M) mode. To activate slow synchronization, use the FLASH button on the lens unit:

Press this button until  appears on the
LCD monitor. Once the flash is set to the slow synchronization mode,
all subsequent shots using flash will use slow synchronization until it is
changed to another.
appears on the
LCD monitor. Once the flash is set to the slow synchronization mode,
all subsequent shots using flash will use slow synchronization until it is
changed to another.
An Important NoteWhen slow synchronization is in effect, shutter speed is slow. Therefore, keep the camera in position until the photograph is saved; otherwise, the image may be blurred by camera shaking. Use a tripod! |