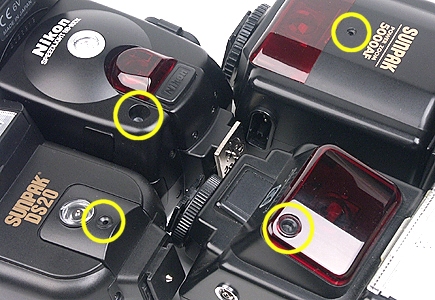
Many external flashes support the automatic (or A) mode. What is this Automatic mode? It is explained on the Flash Exposure Control page. With the automatic mode, a user provides the flash with an aperture and ISO value for correct exposure. Then, the camera triggers the flash, which uses its on-board flash sensor to measure the scene illumination and cut off its power when the scene illumination becomes sufficient based on the given aperture and ISO settings. Thus, the illumination measurement of the flash is independent of the camera light meter. You can easily determine if a particular external flash is capable of the automatic mode by checking its manual or by examine its front panel to find a small hole that houses the flash sensor. The following image shows the location of flash sensor of four external flashes. They are, clock-wise starting from the lower-left corner, Sunpak DS20, Nikon SB-80DX, Sunpak PZ5000AF and Nikon SB22s.
|
| Flash sensors: Nikon 22s, Nikon SB-28 and Sunpak Digital Flash |
The automatic mode requires two user input: aperture and ISO sensitivity. The ISO sensitivity is easy to understand because it is exactly the ISO value used by the camera. The aperture is a little confusing to many beginners. In general, the flash aperture (i.e., the aperture used by a flash) is the aperture used by the camera. However, we do not have to follow this rule precisely, and, as a result, it is important to understand the meaning of an aperture on a flash. An aperture, say Fx.y, on a flash indicates the maximum available flash output that the flash will be used to illuminate the scene. The reason the word maximum is used is that the flash sensor may cut off flash power early before the maximum power is reached when it "sees" the scene illumination is sufficient, and, hence, the actual flash output may be lower than that of the preset Fx.y. For example, suppose the flash aperture is set to F8.0. Due to some reason such as the scene is illuminated well by ambient, the flash power may be cut off early, say F6.0, before it can reach F8.0.
If the camera and flash both use F8.0, the flash must prepare an illumination that can go as high as F8.0. The power for F8.0 is twice the power of that for F5.6 because the opening for aperture F8.0 is 50% of the opening of the aperture F5.6, and to maintain the same amount of illumination the flash must send out twice the power of F5.6 for the F8.0. Therefore, a small aperture used on a flash causes the flash sends out more flash power, and the flash output for F8.0 is twice of the flash power of F5.6, which, in turn, has a output power twice of the F4.0. We shall use various sample shots to illustrate this fact.
It is easy to use the Automatic mode with your FZ-10. The following is a possible procedure of using an external flash that supports the automatic mode and has an aperture setting capability.
Important NotesYour external flash may not be powerful enough to illuminate the scene with a given aperture. Recall that the guide number of a flash is equal to the product of flash-subject distance and aperture. Therefore, if the selected aperture is small (resp., large), the flash-subject distance must be short (resp., long) to properly illuminate the scene. For example, suppose we use ISO 100 and a flash of GN 50. If we choose to use F8.0, the flash-subject distance should be less than or equal to 50/8 = 6.25 ft. If the flash-subject distance is larger than this value, the image will be under-exposed. Should this happen, use a larger aperture or move your flash closer to the subjects. Moreover, each external flash has its own minimum power output. If the flash-subject distance is too short, it is possible that the flash will not be able to reduce the power further to match the selected large aperture, then you will have an over-exposed image. Should this happens, use a smaller aperture and/or move away from your subject to increase the flash-subject distance. |
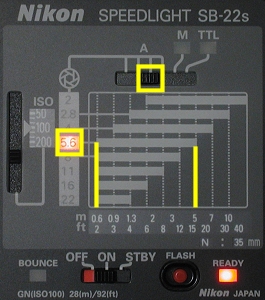
Let us use a few examples to illustrate this procedure. The first one uses Nikon's SB-22s, a small external flash. Although we use a Nikon SB-22s, most flashes should share the same procedure. The vertical slide in the left edge of the back panel is for choosing the ISO speed. In the left image below the ISO speed is set to 100. Many flashes do not permit to choose an arbitrary aperture in the Automatic mode. Instead, they provide a number of pre-selected apertures. In the case of SB-22s, there are four such selections as shown in the top part of the image (i.e., four positions under the letter A). The slide is positioned at the second aperture setting from the right. Note that the flash is in the A mode. With this setting, the flash selects F5.6, which is highlighted. Then, the horizontal scale next to 5.6 provides the effective range of using F5.6. In the image, it is 2 ft to 15 ft. Therefore, as long as the flash-subject distance is within this range, the subject will be properly illuminated. What we need to do is to set the camera to use aperture F5.6 in the aperture-priority mode, and take the shot. Note that if the flash-subject distance is larger (resp., shorter) than 15 ft (resp., 2 ft), you will likely get under- (resp., over-) exposed results. Note also that what is important is the flash-subject distance rather than the camera-subject distance. Hence, as long as the flash-subject distance is within the indicated range, it does not matter how large or how small the camera-subject distance is. Well, at least in theory!
|
|
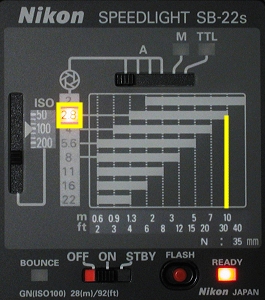
| Nikon 22s's back panel | |
On the other hand, we can also use flash-subject distance to find an aperture. Suppose the flash-subject distance is slightly larger than 20 ft. From the 20 ft vertical line as shown in the right image above, we see that aperture F2.8 is needed. Hence, both the flash and camera are set to use F2.8 and ISO 100.
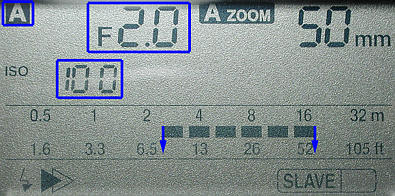
The second example uses a high power flash, Sunpak PZ5000AF. The following is the back panel of a Sunpak PZ5000 AF. It shows that the ISO speed and aperture are 100 and F2.0, respectively, and the focal length is 50mm. The scale indicates under F2.0 the effective distance is about 7 ft to 52 ft. Thus, as long as your subjects are within this range, the A mode will illuminate the scene properly.
|
| Sunpak PZ5000AF's back panel |
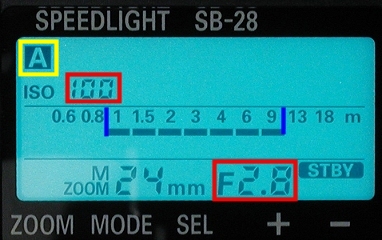
The third example uses Nikon's SB-28. The following is the back panel of a Nikon SB-28. It shows that the ISO speed is 100, the aperture used is F2.8, the focal length is set to 24mm, and the effective flash-subject distance is approximately 1 meter (3 ft) and 10 meter (30 ft). Thus, as long as the subject is within 3 ft and 30 ft from the flash, the exposure should be a correct one.
|
| Nikon SB-28's back panel |
It is possible that your flash unit does not allow you to set the aperture. In this case, the procedure discussed in the previous section may not work. However, you still can use the Automatic mode, if your flash supports it. Here is a modified procedure:
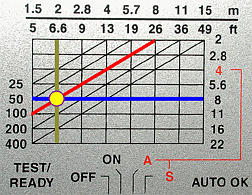
Let us take a look at an example. Most non-TTL flashes have some kind of "exposure" table on their back panel. The form may vary; but, the idea is to incorporate the relation of ISO speed, aperture, and flash-subject distance into an easy-to-read table. The following is the table on the back panel of Sunpak's Digital Flash. (The Sunpak DS 20 has the same table.) This is a generic non-TTL flash that can be used in the automatic mode, manual mode and slave mode. Other flashes may have a table different from this one; but, in general, the way of using it should be similar. The ISO speed is represented as south-west to north-east diagonal lines (shown in red). On each diagonal, there are a number of combinations of aperture (shown in blue) and its corresponding flash-subject distance (shown in green). Suppose we intend to use ISO speed 100. Then, we should look up the diagonal starting with the corresponding ISO speed. In the figure this diagonal is shown in red. If the selected aperture is F8.0, we should trace the horizontal line starting with F8.0, shown in blue, until it intersects the diagonal. The vertical line through the intersection point, shown in green, gives the flash-subject distance 6.6 ft. On the other hand, if the position of the flash is chosen first at some distance, say 13 ft, then we should trace the vertical line starting with 13 ft until it intersects the diagonal. The horizontal line through the intersection point gives the corresponding aperture. In this case, the aperture is F4.0.
|
| Sunpak Digital Flash's back panel |
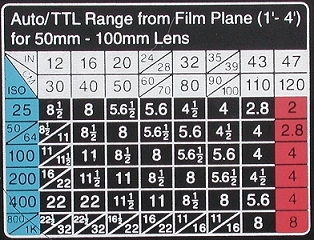
The following is another way of presenting the ISO, aperture, and flash-subject distance information. Suppose the ISO speed is 100. The row of 100 shows the relationship between aperture and its corresponding flash-subject distance. For example, if the flash-subject distance is 16 (resp., 32) inches, check the intersection of the row of 100 and the column of 16 (resp., 32) and the corresponding aperture is F11.0 (resp., F5.6 1/2). On the other hand, if the aperture is known, we simply scan the row of 100 to locate the aperture value. The column that contains the aperture gives the corresponding flash-subject distance. For example, if the desired aperture is F8.0, the corresponding column heading shows 24/28 inches. This means that F8.0 would work fine with a flash-subject distance of 24-28 inches. Note that different flashes have different levels of output power, and, hence, their tables will also be different.
|
To show the impact of flash aperture and lens aperture on exposure, a series of images were taken using various flash apertures and lens apertures. In the following, images on each row (resp., column) were taken with the same lens (resp., flash) aperture. Thus, only the images on the south-east going diagonal used the same lens and flash apertures. Images above the diagonal were taken with smaller flash apertures than the lens apertures, and, as a result, the flash sends out more power than the camera actually needs, causing over-exposed results. Similarly, images below the diagonal were taken with larger flash apertures than the lens apertures, and, hence, the flash sends out less power than the camera actually needs, causing under-exposed results. All images were taken by a flash mounted on the hotshoe of the camera.
| |
Flash F2.8 | Flash F4.0 | Flash F5.6 | Flash F8.0 |
| Lens F2.8 |

|
|
|

|
| Lens F4.0 |
|
|
|
|
| Lens F5.6 |

|
|
|

|
| Lens F8.0 |
|
|
|

|
| Click on the image to view a larger one | ||||
Let us consider a specific column as an example. The images on the Flash F5.6 column, from top down, were taken with lens aperture F2.8, F4.0, F5.6 and F8.0. Since the flash aperture is F5.6, only the image taken with lens aperture F5.6 would the "theoretically" correct one. The image taken with F4.0 allows twice light to hit the sensor, and is over-exposed. Similarly, the image taken with F2.8 allows four times of the needed F5.6 is twice over-exposed as the one taken with F4.0, and four times over-exposed as the one using F5.6. Since lens aperture F8.0 has an opening 50% of the opening of that of the F5.6, the image taken with flash aperture F5.6 can only provide 50% of the needed light and hence the image is under-exposed.
Let us see the row of Lens F5.6. The images on this row, from left to right, were taken with flash aperture F2.8, F4.0, F5.6 and F8.0. If the flash uses aperture F2.8, it will send out only 1/4 of the needed power (for F5.6) and the image is under-exposed. Similarly, if the flash uses aperture F4.0, it will send out 1/2 of the needed power and the image is still under-exposed. Finally, if the flash uses aperture F8.0, it will send out 200% of the needed power and the image is over-exposed.
In the automatic mode, we can use camera aperture, flash aperture, ISO sensitivity and flash-subject distance for exposure compensation. If we wish to fix the flash-subject distance, which is perhaps the more common way, we can set the lens aperture and flash aperture to different values for exposure compensation. For example, if we believe F5.6 on both the lens and flash is a little under-exposed, we can open up the lens aperture to F5.2, F4.6 or F4.0 for +1/3, +2/3 or +1 stop compensation. Because the lens aperture is larger than the flash aperture, the lens will allow more light to reach the sensor, making the image brighter. This is shown by the images above the diagonal. On the other hand, if we believe both F5.6 would cause an over-exposed image, we can close down the lens aperture to F6.5, F7.3 or F8.0 for -1/3, -2/3 and -1 stop compensation. In this case, the flash aperture is smaller than the lens aperture, causing the flash to send out less output, and hence the image is under-exposed. This is shown by the images below the diagonal.
Can we use the flash aperture to do the same? Yes, of course. We use the lens aperture as example because many flashes do not have 1/3 power adjustment. If we have such a flash that permits us to adjust output power in the automatic mode, we can fix the lens aperture and use the flash aperture for compensation. For example, if we believe F5.6 on the lens and flash do not provide sufficient illumination, we can adjust the flash aperture to F6.5, F7.3 and F8.0 for +1/3, +2/3 or +1 stop compensation. In this case, the flash will send out more power than the required F5.6 and the image will receive more illumination.
We can also change the flash-subject distance to perform exposure compensation. For example, suppose the flash-subject distance is d. If we want to keep the aperture fixed and increase (resp., decrease) the flash illumination by one stop, then we can simply change the flash-subject distance to d/2 (resp., 2d).
Some good flashes provides a dial on the back panel for setting flash compensation. This is of course a more convenient way. Check your flash manual for the details.
In some situations such as in a party, the camera-subject distance and flash-subject distance are almost equal (because the flash is perhaps mounted on the camera or a bracket), the automatic mode can be very useful. For example, if we anticipate that the shooting distance is about 10 ft, we can set the flash to the automatic mode, select an aperture that is good for 10 ft and also use this aperture on the camera. Thus, as long as your subjects are within this distance, you will likely get decent images. Use a larger (resp., smaller) lens aperture if the flash-subject distance is larger (resp., shorter) than the indicated flash effective distance.
The real advantages of using the automatic mode are bounce and off-camera flash operations. We will discuss off-camera flash operations on a separate page. Take a look at the above 16 images. The subjects are illuminated by direct flash light (i.e., light leaving the flash and striking the subject directly). Direct illumination normally produces a very harsh looking result with many hot spots (i.e., bright highlight).
Many flashes have a bounce-capable head. See the Bounce and Swivel Flash Head section of Basic Functions of an External Flash for more details. With a bounce capable flash, we can tilt the flash head up so that the flash light will hit the ceiling and bounce back to the main subject. In this way, the bounced flash light will be softer than the direct illumination. There are two issues we have to be aware of. First, bounded light has a longer light path than direct light because the light goes out from the flash, hits the ceiling and bounces back. Therefore, bounced light is weaker than direct light. Second, the ceiling can absorb a portion of the flash light. Therefore, the intensity of bounced light with a flash aperture F8.0 will be weaker than the F8.0 direct light. How much weaker depends on the flash-subject distance, the height of the ceiling, and the angle of tilting the flash head. In general, the loss of +1 stop or more is common. One more issues we should also take into consideration: the color of the ceiling used for bouncing. If it is colored, the bounced light will also carry a touch of that color to your subject.
Why is the automatic mode helpful to bouncing? The reason is very simple. The flash sensor points at the subject even though the flash head is tilted up for bounce. In this way, the sensor measures the scene illumination directly and cuts off flash power when illumination is sufficient. It is possible that the scene illumination cannot reach the desired level set by the flash aperture due to many reasons (e.g., the flash does not have sufficient power, the ceiling too high causing significant light loss, and/or the flash-subject distance is too long). In this case, we will get under-exposed results. Should this happen, we may use a smaller flash aperture, use a larger lens aperture, and/or move closer to the subject.
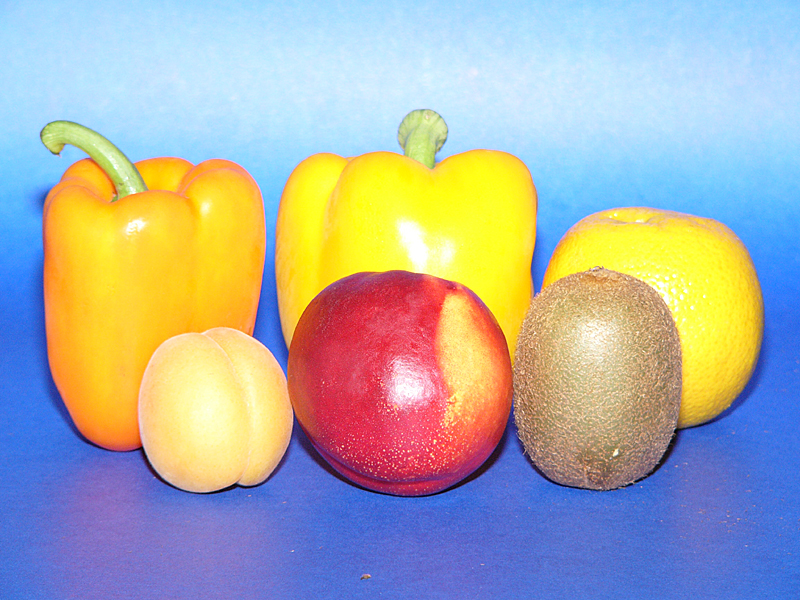
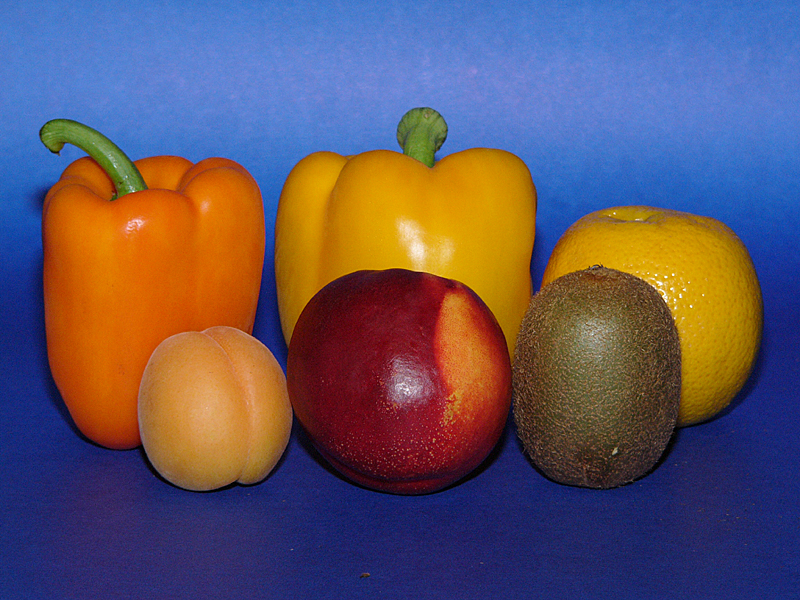
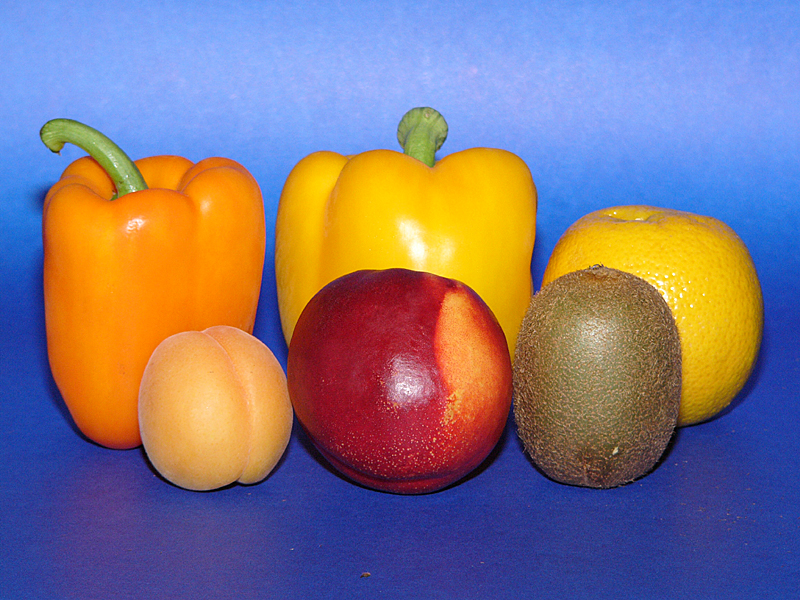
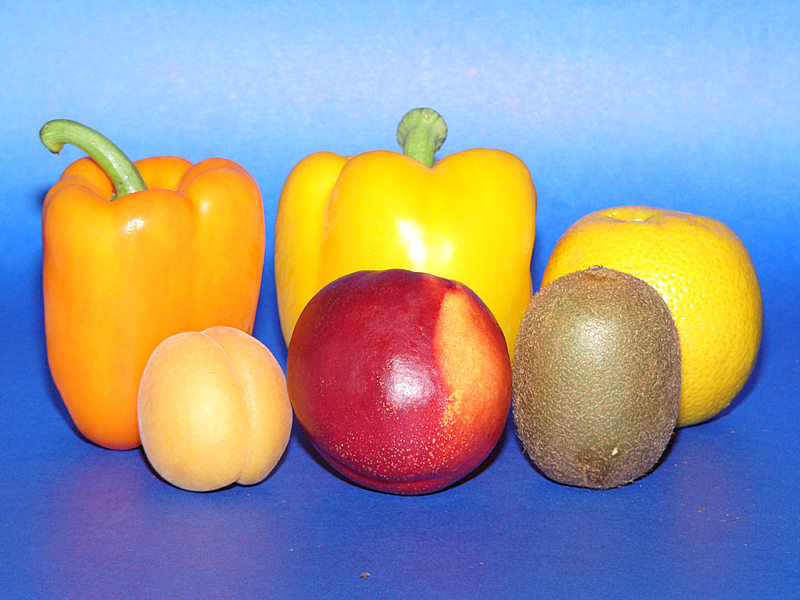
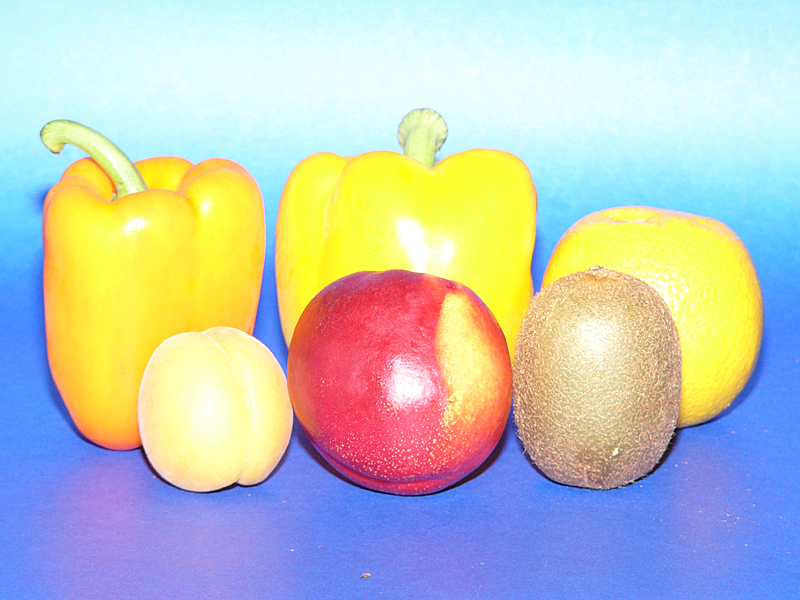
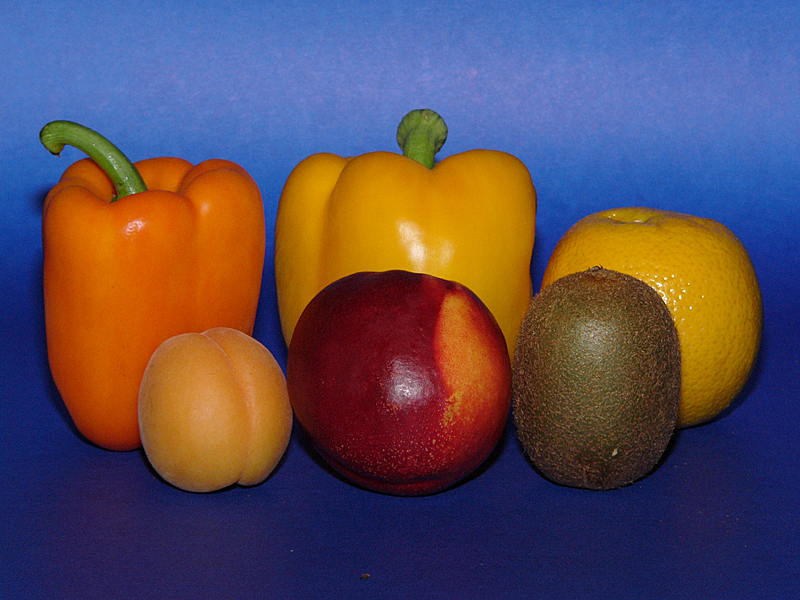
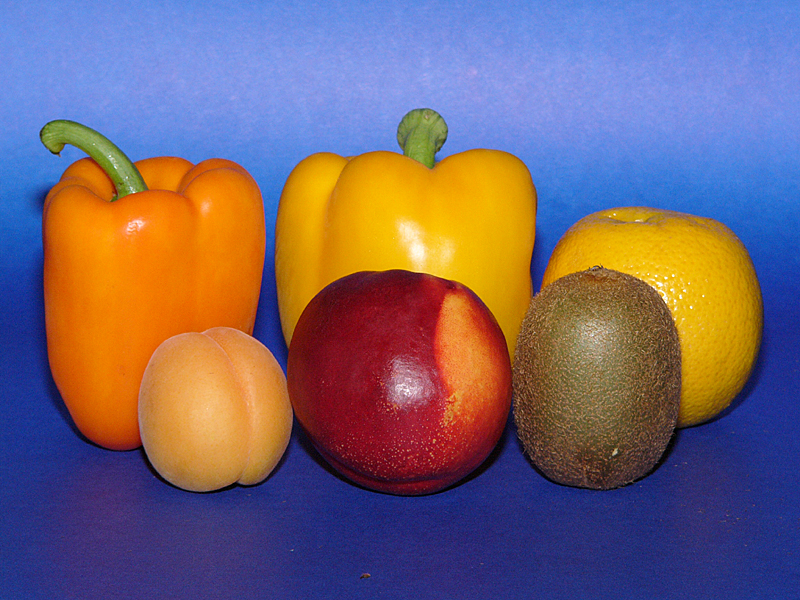
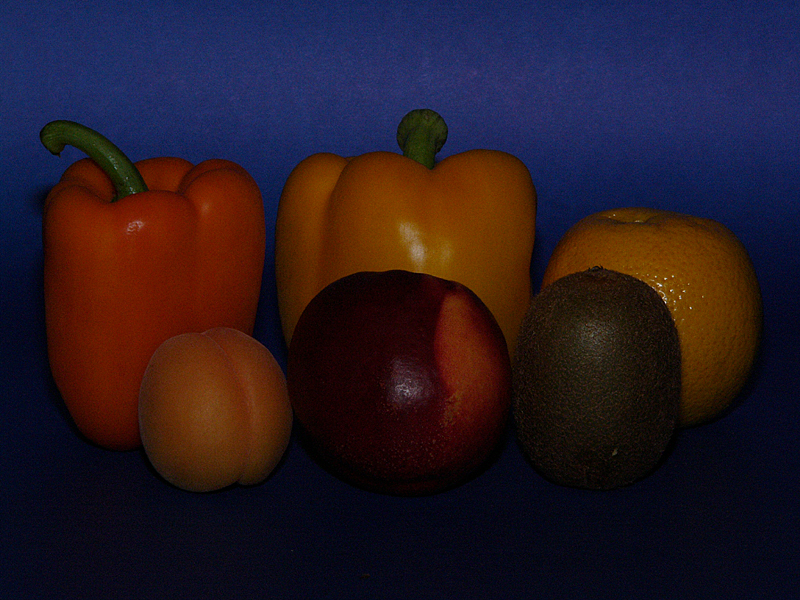
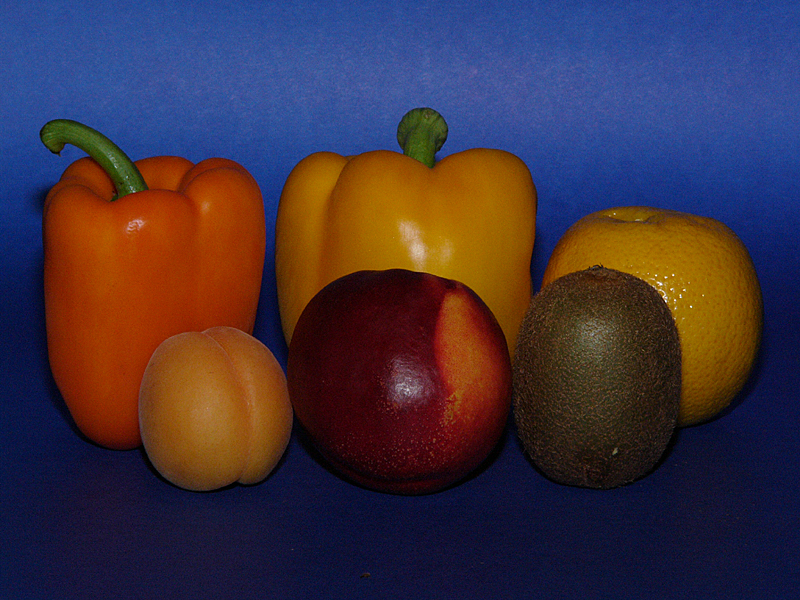
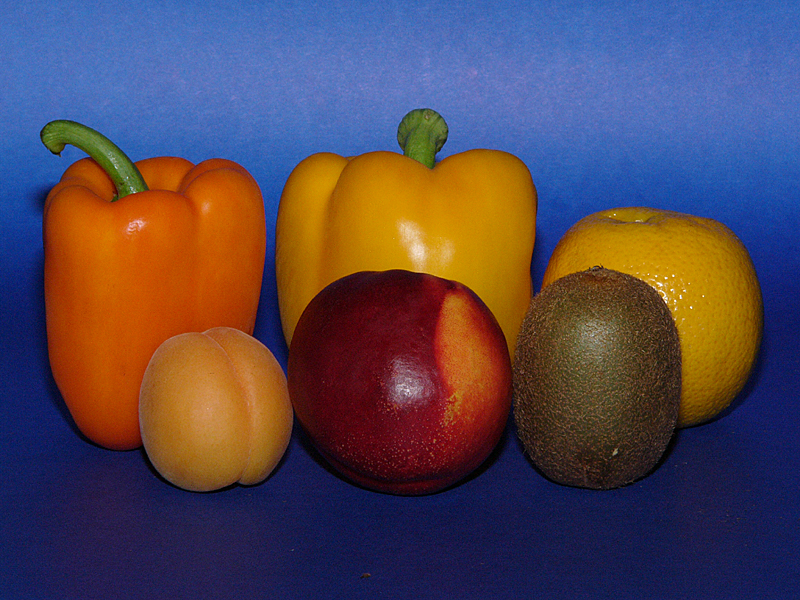
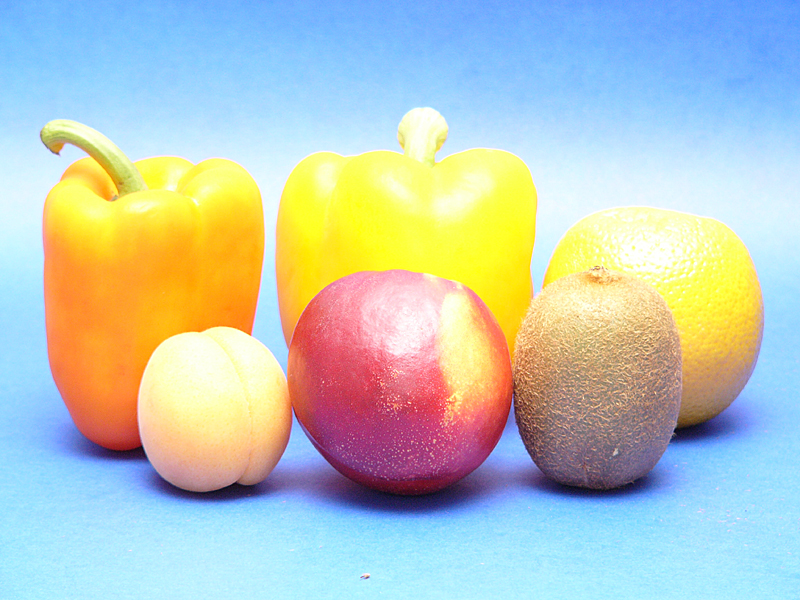
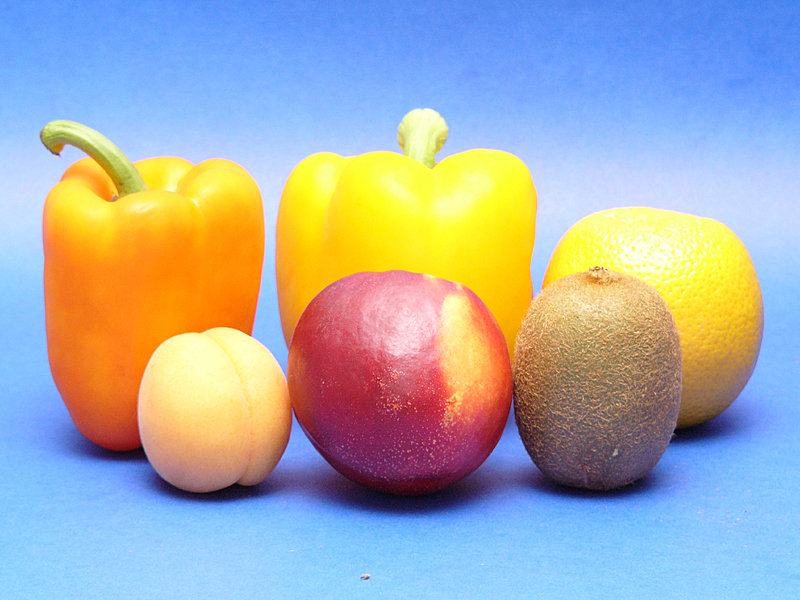
The following four images were taken using a flash with a bounce-capable head. The flash aperture used was F8.0 in order to send out more light. The lens aperture used was F2.8, F4.0, F5.6 and F8.0. Since the flash head is in bounce position, we anticipate to have +1 stop of light loss, and, hence, the lens aperture of F5.6 may be a correct choice. It turns out to be the case. In the four images, the ones using F2.8 and F4.0 seem over-exposed, and the one using F8.0 is under-exposed. Now look at the F5.6 image and compare it with the well-exposed images on the diagonal in the 4×4 image array. We can easily recognize a few important facts. First, the shadows in the image using bounced light are "below" the subjects while the shadows in the direct illumination are behind the subjects. Second, the harsh looking of the direct illumination becomes soft with bounce light. Consequently, the image looks more pleasant.
|
|
| F2.8 | F4.0 |

|
|
| F5.6 | F8.0 |
| Click on the image to view a larger one | |
In Camera Setup, we mentioned that the camera can be set to either PRESET or MANUAL. With the PRESET option, the camera will use F2.8 and ISO 100. Thus, if we choose to this option, we must also set the flash aperture to F2.8 and ISO to 100. If we choose to use the MANUAL option, we can use any lens aperture and ISO sensitivity. As a result, the MANUAL option is more flexible. Note that we still can use flash aperture for flash compensation.
White balance is in general not an issue when using flashes because most flashes have their color temperature set to day light. Therefore, we can simply use the auto white balance setting. Of course, we certainly can set the white balance to flash; however, in my opinion, it is unnecessary and the auto white balance option works fine.