Here are a few tips of using "cheap" slave flash units such as the Flashmate.
Please keep in mind that the guide numbers of the built-in flash and the Flashmate are approximately the same (i.e., 30ft at ISO 100). Therefore, these two flash units are equally powerful. The inverse square law states that if the distance between a light source and the subject is doubled, the brightness of the illuminated surface reduces to a quarter of the original. Based on this understanding, we can use a number of experiments to illustrate the effects of positioning the slave flash unit.
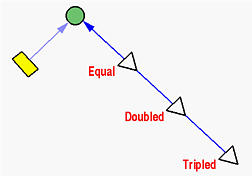
The first experiment is about the inverse square law, which helps position a slave flash unit. The camera and the slave flash unit are positioned as in the following figure. The flash light from the built-in flash and flash light from the slave unit are roughly perpendicular to each other. The heights of the flash and the camera are approximately the same. However, the position of the camera is fixed, while the slave flash unit will be moved away from the vase in the indicated direction.

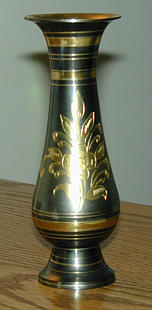
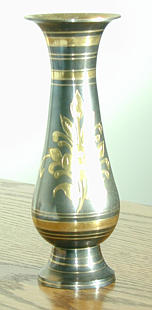
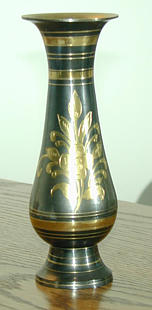
The left-most photo below uses only the built-in flash, and the remaining three are taken with the slave unit in equal, doubled and tripled distances. It is clear that the photo taken with only the built-in flash looks dull with strong shadow. The "equal distance" one washes out, because the camera metering system only sees the effect of the built-in flash. When both flashes fire, it is equivalent to generate a lighting effect of doubled intensity. Note that there are two highlights rather than one as now we have two light sources. Note also that the background becomes much brighter. As the distance between the slave flash and the subject increases, the color and brightness of the subject become more natural. For the "tripled distance" photo, the light intensity of the slave unit is only 1/9 of the "equal distance" case. Based on these results, you might want to position the slave unit farther away from your subject (i.e., the distance between your subject and the slave must be at least twice larger than the distance between your subject and the camera) to get a good shot.
 |
 |
 |
 |
| Original | Equal | Doubled | Tripled |
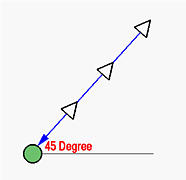
The results shown above may not be very pleasant because there are two highlights. To overcome this problem, one can use the "45 degree" rule. More precisely, the light direction makes a 45 degree with the floor as shown below. In fact, it does not have to be 45 degree, and the angle depends on your subjects. Note that raising the slave unit so that it has a different height from that of the camera will not only change or even eliminate the highlight of the slave but also reduce the chance to have red-eyes.
 |
 |
 |
 |
| Original | Equal | Doubled | Tripled |
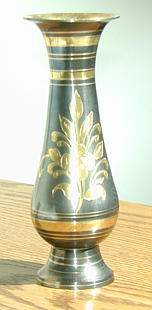
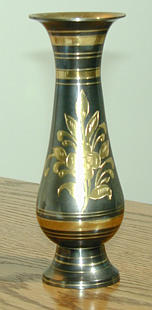
The above photos are taken with the camera fixed and the slave looks down the subject with a 45 degree angle. We also move the slave unit so that the distance between the slave and the subject is equal, twice, and three times of the distance between the subject and the camera. The left-most photo is the original (i.e., no slave flash unit used). Because the slave shoots downward, its highlight is gone and only appears on the base of the vase. Moreover, the texture of the table top looks more natural. The quality of these photos is certainly better than those with the slave unit placed at the same height as the camera.
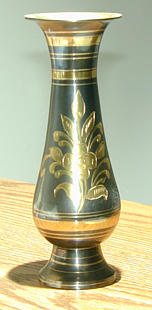
Hair light is also an useful position. In this case, the slave is placed on top of the subject and shoots downward. This is the way of creating a hair highlight in your portrait photos. Certainly, the light path does not have to perpendicular to the floor. You can adjust its position based on your need. The following three photos show the effect. The left-most one, again, is taken with the built-in flash. The middle one has the slave placed directly on top of the vase with a distance equal to the subject distance. The table top washes out. However, if the distance between the subject and the slave is doubled, we have a quite pleasant photo as shown in the right-most one.
 |
 |
 |
| Original | Equal | Doubled |