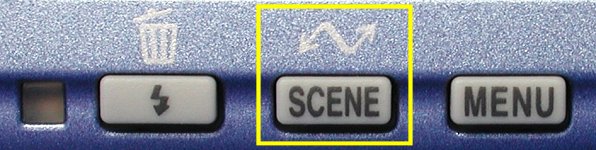
To enter the Close Up mode, press the SCENE button:
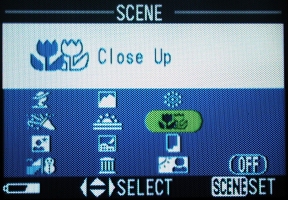
Then, the following SCENE menu appears.
Use the arrows of the multi-selector to highlight the close up icon
![]() , and press the
SCENE button to return to the
shooting mode. After this, the camera is in the
Close Up mode. To return to the non-scene
mode or to switch to another mode, one must go through the above procedure and
select OFF or another scene mode icon, respectively.
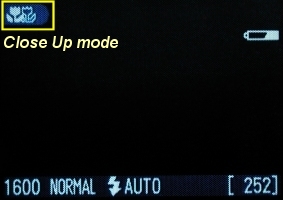
Once the selection of the Close Up mode
completes, the double-flower close up icon appears in the upper-left corner
of the monitor as shown in the right image below.
, and press the
SCENE button to return to the
shooting mode. After this, the camera is in the
Close Up mode. To return to the non-scene
mode or to switch to another mode, one must go through the above procedure and
select OFF or another scene mode icon, respectively.
Once the selection of the Close Up mode
completes, the double-flower close up icon appears in the upper-left corner
of the monitor as shown in the right image below.
|
|
|
| The SCENE menu | Camera is in the Close Up mode |
| In the Close Up mode, the available options are identical to the A mode. More precisely, pressing the MENU button, you can select Image Quality, Image Size and Exposure Compensation. None of the other options in the M mode is available. |
As we all know, when we get closer to an subject, it appears to be bigger. This is the merit of the close up mode, which allows us to move the camera closer to the subject. Once the camera is in the Close Up mode, it automatically zooms the lens to the middle portion so that you can focus at a distance as close as 4cm or 1.6". Note that in the Close Up mode, the camera will use the center portion for focusing. Therefore, if your subjects are not at the center, or you intentionally put your subjects off center, the camera will focus on the wrong subject, and the reference point will be sharply focused and your main subjects may be out-of-focus. Moreover, the camera will also use the center portion for exposure metering (i.e., determining the aperture and shutter speed to be used). If your main subjects are off-center, the resulting image may also be incorrectly exposed. Consequently, if your main subjects are not at the center portion, use the following procedure:
|
|
| Far main subject | Near main subject |
| Click on the image to see a larger one | |
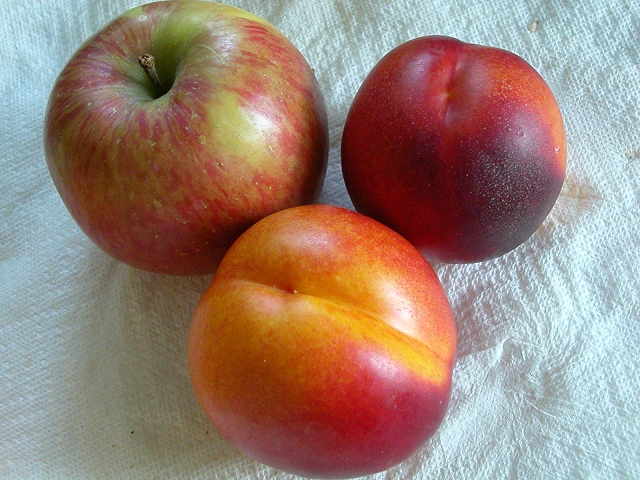
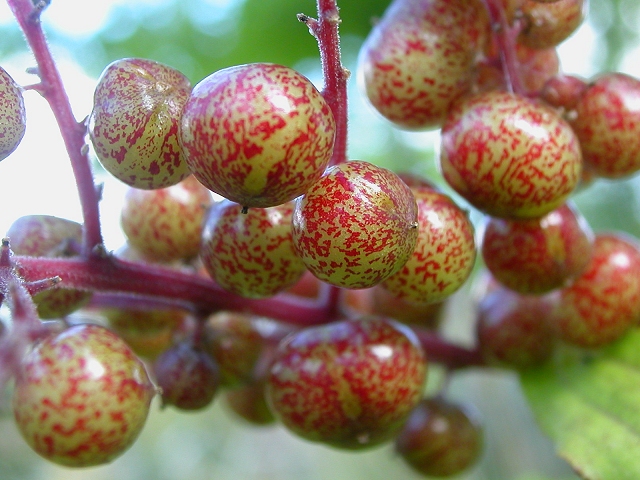
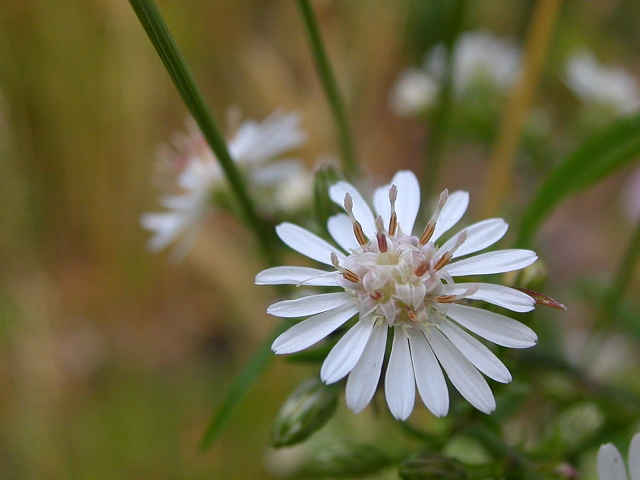
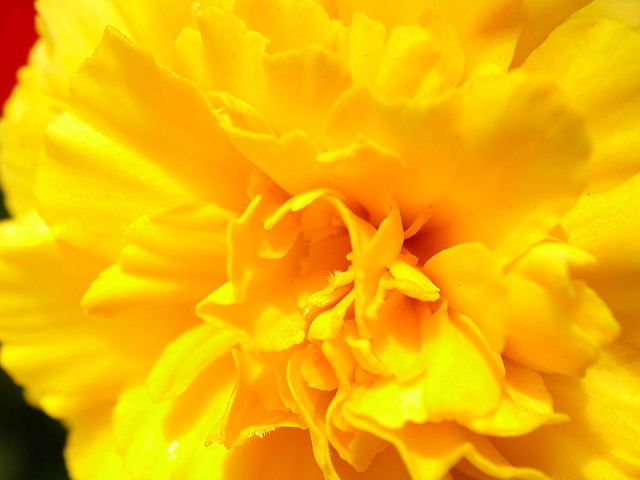
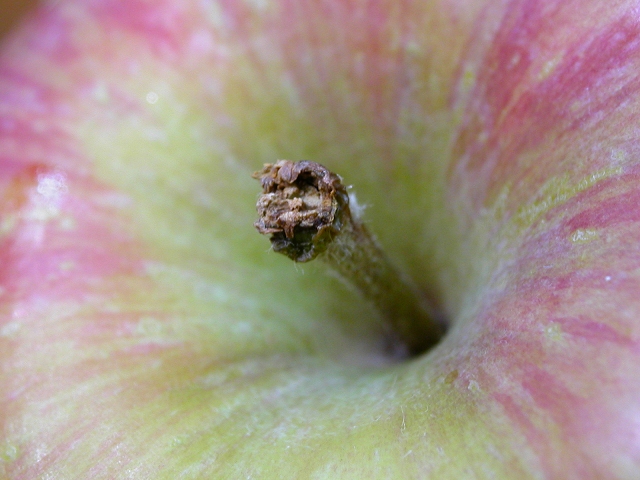
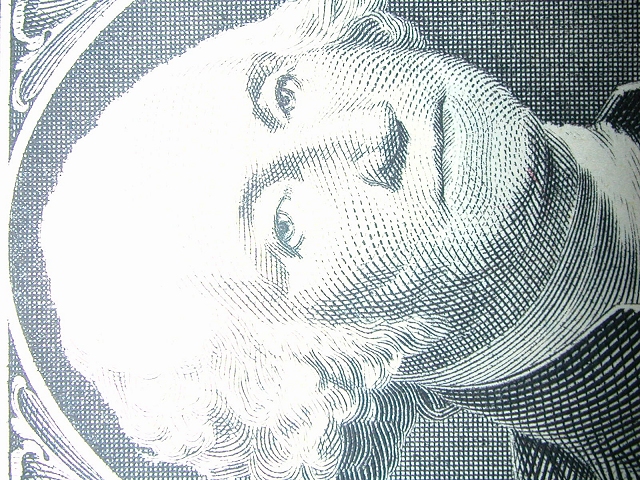
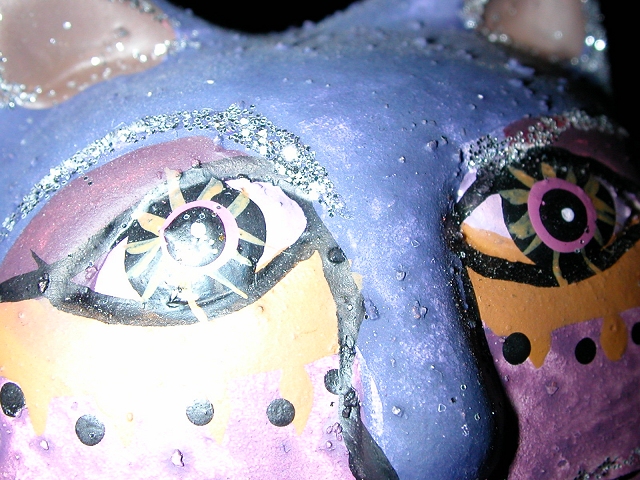
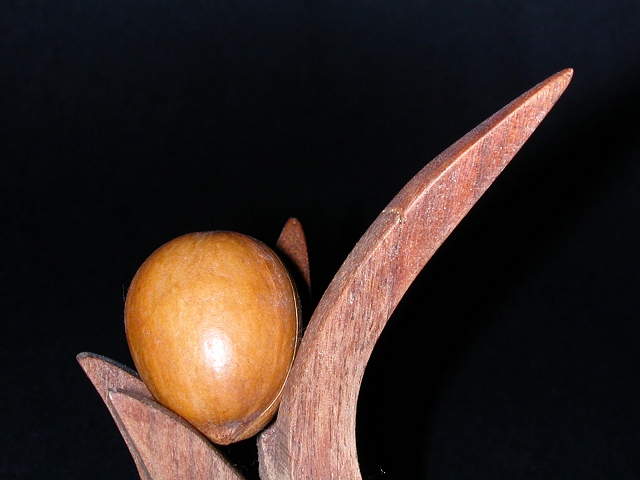
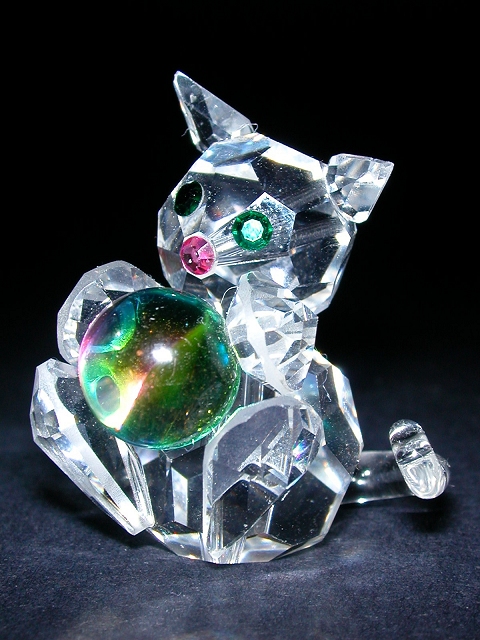
The following images show you the capability of 2500 in the Close Up mode. Note that not all images were shot at the minimum focusing distance 4cm. But, most shots were done within 20cm to 30cm, and some of them were obviously taken at a distance very close to 4cm.

|

|
|

|
|
|
|
|
|
|
| Click on the image to see a larger one | ||
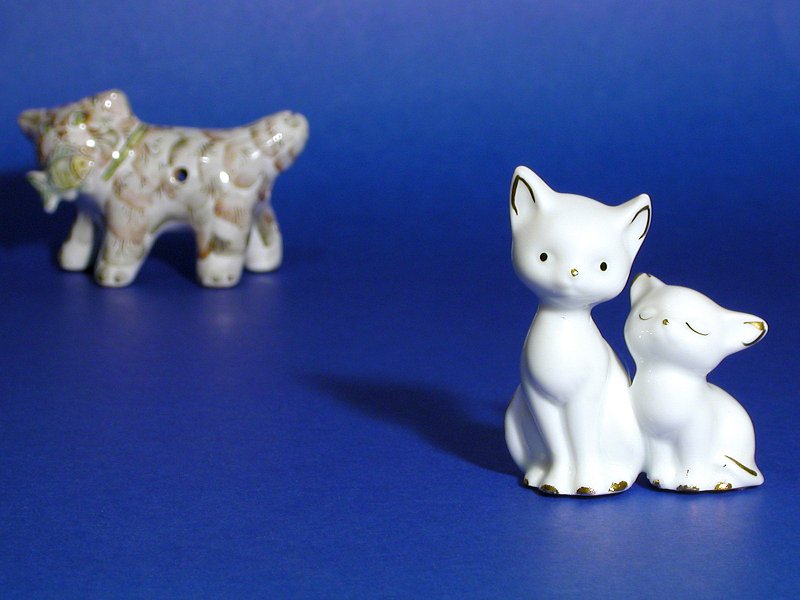
Just a reminder. If the subject does not fill the whole image, keep the background simple. Otherwise, the background could cause some distraction. Try to change shooting position and/or angle to avoid complex background.
The internal flash may be used in the close up mode. However, if the focusing distance is very short (i.e., say 2 inches), the internal flash will not be able to illuminate the subject completely. Consequently, the resulting image will have a bright, perhaps over-exposed, left side and a darker or under-exposed right side. The following images are examples. The left side receives the illumination from the internal flash and is very bright and somewhat washed out. Thus, the illumination is un-even.
|
|
| Click on the image to see a larger one | |
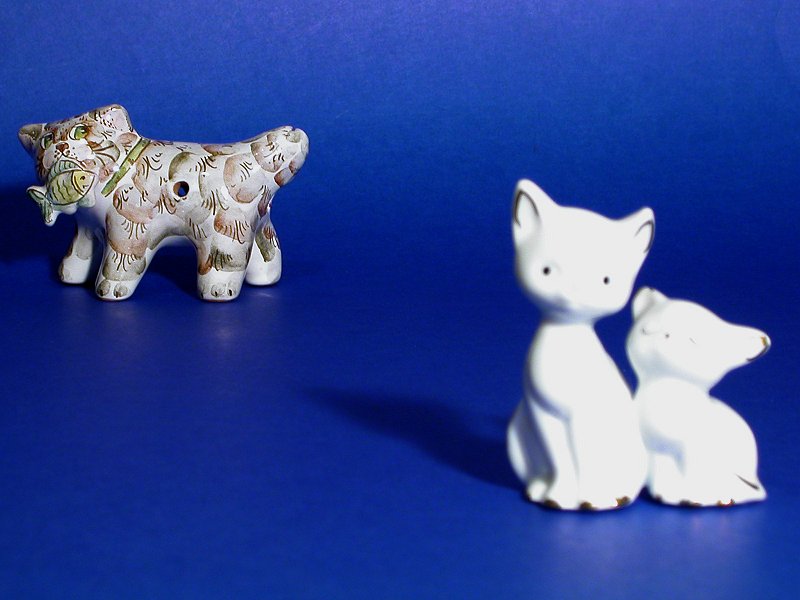
On the other hand, pull the camera back to increase the distance between the flash and the subject so that the subject can be illuminated properly. Then, you will see some very different results. All of the images below were shot in less than 1 foot with a black ground to keep it simple and make the subject standing out.

|
|
|
| Click on the image to see a larger one | ||
The internal flash can also be used in day light. However, it may over-power the sun light, especially the background is far away. When we use the close up mode, the subject is usually close to the camera (and the internal flash). As a result, the subject may receive a full illumination from the internal flash while the background does not. Hence, the subject may be illuminated properly and the background may be very dark. The left image below was taken without the use of the internal flash, and the blurred background can be seen clearly. The right one used the internal flash and the background becomes almost dark. If this is not the effect you want, try to change shooting position and angle. Or, you could use your cloth as a background!

|
|
| Without flash | With flash |
| Click on the image to see a larger one | |
In situations in which the natural light may be insufficient and the flash light may be too strong, additional lighting equipment can be used. You can quickly rule out an external flash for a good reason: your Coolpix 2500 has no external flash connector! Or, you may get a slave (external) flash. This may not make sense for close up because most slave flashes are triggered by the master flash, which is the internal flash. More precisely, you must left the internal flash to fire in order to fire the slave external flash. If you believe this is an acceptable way, you have many choices. Otherwise, you could consider some LED or fluorescent light sources or even a good white light bulb. Keep in mind that since white balance preset is not available in the SCENE modes, to get the best result the color temperature of your light source should be very close to sun light. A possible choice is Nikon's Cool Light SL-1. This is a low power LED ring light. Click here to learn more. The two images below and the last three images on the first row and the last image on the third row in the very beginning of this page were taken using the Cool Light SL-1.
|

|
| Click on the image to see a larger one | |
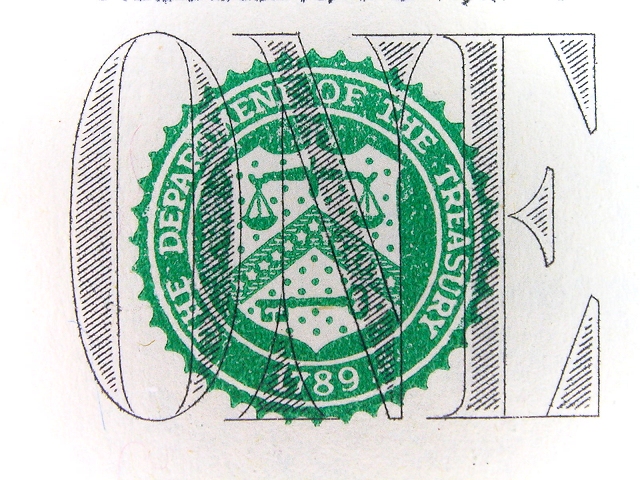
With this nice close up capability, the 2500 provides a cheap way of duplicating slides. Here is what you need: a small light box and a little tripod that can support the camera to focus down to a few centimeters. Then, turn on the lightbox, turn off all other light sources (to prevent incorrect white balance), compose, and shoot. A sample setup is shown below:
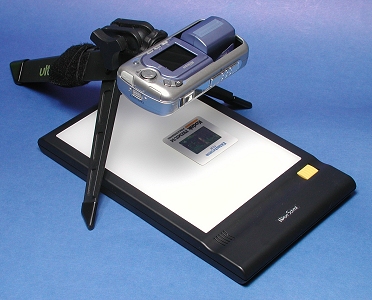
How good is this setup? Of course, it cannot compete again a reasonably good slide scanner; however, the investment is a fraction of it, thanks due to 2500's close up capability. Keep in mind that the contrast in the copy is usually high, and, as a result, shadow and highlight details may be lost. Unfortunately, there is no way to combat this problem because we cannot use exposure compensation in the close up mode. Since the 2500 is a 2 million-pixel camera, this resolution is way too low to reveal all the fine details and texture recorded on a good slide film. Finally, because the camera is so close to the slide, reflection of the camera on the film surface may be visible. Try to shield the camera with a non-reflective dark color material to minimize reflection. The following are two examples. Both shots were taken with a Nikon F5 and AF 80-200 F2.8 zoom lens recorded on Kodak E100VS slide film. The 2500 preserves the color quite well; however, due to high contrast, some details are gone. Resolution also suffers. But, do not forget that doing slide copying this way is much cheaper than buying a film scanner. Consider this as the first step of slide copying.

|

|
| Click on the image to see a larger one | |
While the close up mode is wonderful, it does have a serious drawback: we cannot choose any other options (e.g., white balance and sharpening). Moreover, when the camera is too close to the subject, lighting setup is very challenging. In many situations, we just wish that we can move the camera back to get some room for lighting. Should this occur frequently, you might want to consider a couple of close up lenses or close up attachment. Some may refer to these lenses as filters; however, this may not be appropriate because they are not filters.
What is the purpose of using close up lenses? Simple: Bring your camera closer to the subject! This is what the name implies. For example, my measurement shows that, when the camera is not in the close up mode and the lens is zoomed all the way in, the 2500 has a minimum working distance about 23cm. A working distance is the distance between the front end of the camera lens and the subject. With a working distance of 23cm, it is quite convenient for setting up light and using flash. With a higher power close up lens, this working distance may be reduced to about 12cm, which still provide sufficient space for lighting and the use of other accessories.
Just like filters, close up lenses have many thread sizes. Since the 2500 lens is not threaded, thread size does not matter because we must hand-hold it in front of the lens. The following image shows three close up lenses of 37mm. There are smaller thread sizes such as 30mm; however, smaller ones are usually more expansive and lack of choices.
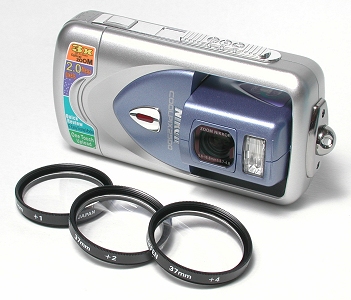
The most important factor of Close up lenses is their power, described as diopter power or diopter for short. The most commonly seen close up lenses have diopters +1, +2, +3, +4, and +5. There are higher ones; but, they are more expansive. Many manufactures put three close up lenses, usually +1, +2 and +4, into a single close up lens set. The non-technical meaning of "diopter" is very simple, a high diopter close up lens can bring the camera closer to the subject than a lower diopter close up lens can. The diopter that brings the camera from a working distance of 23cm down to 12cm as mentioned earlier is a +4 close up lens. If a +2 (resp., +1) close up lens is used, the minimum working distance can only go down to 17cm (resp., 20cm).
Close up lenses can be stacked up to get a higher power, and the resulting diopter power is the sum of all stacked lenses. For example, stacking a +4 and a +2 yields a close up lens of diopter +6, and staking a +1 and +2 close up lenses yields a close up lens of diopter +3. While it is not recommended to stack more than two close up lenses together, if we stack +1, +2 and +4 close up lenses, the result is a +7 diopter close up lens. When the diopter goes up, the minimum working distance goes down. For example, the minimum working distance of stacking +2 and +4 diopters is approximately 9.5cm, and the minimum working distance of stacking +1, +2 and +4 diopters is about 8cm. Note that the working distance is measured between the subject and the front of the close up lens.
The combinations that can be obtained from a set of +1, +2 and +4 diopters include +1, +2, +3 (+1 and +2), +4, +5 (+1 and +4), +6 (+2 and +4) and +7 (+1, +2 and +4). When stacking close up lenses together, the largest one should be the one closest to the camera lens and the smallest one should be the one closest to the subject. Also note that do not stack more than two close up lenses together because the quality decreases as the number of stacked close up lenses increases.
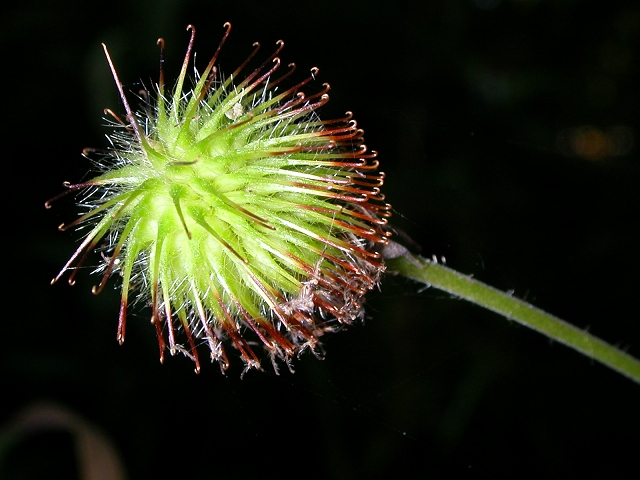
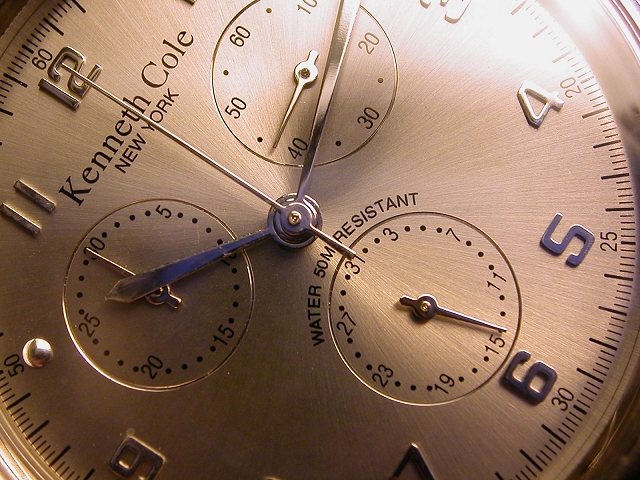
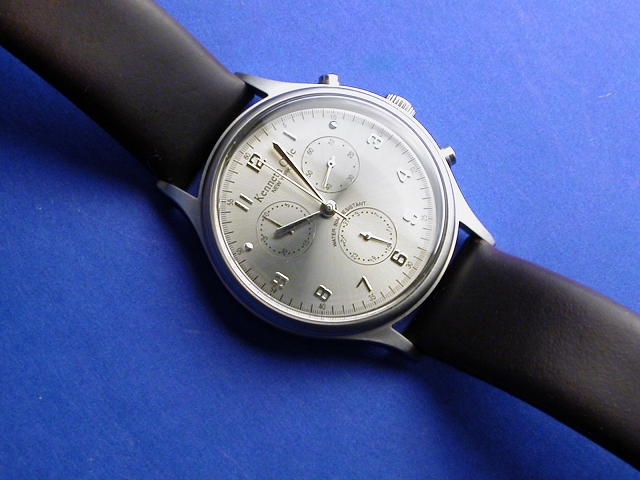
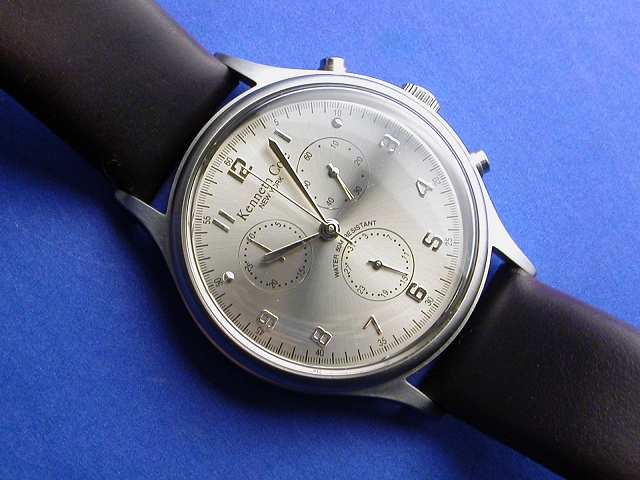
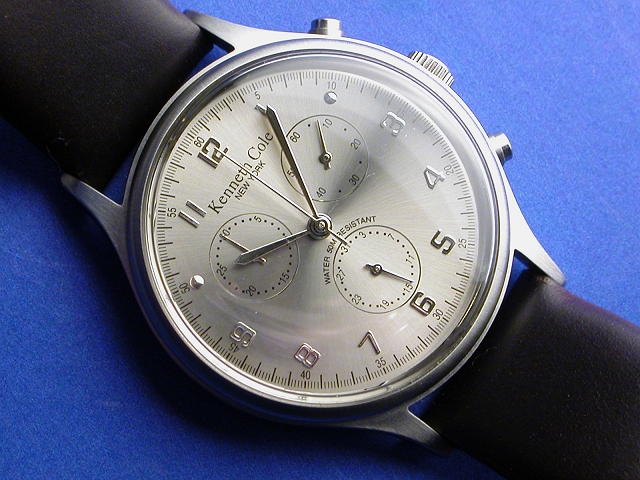
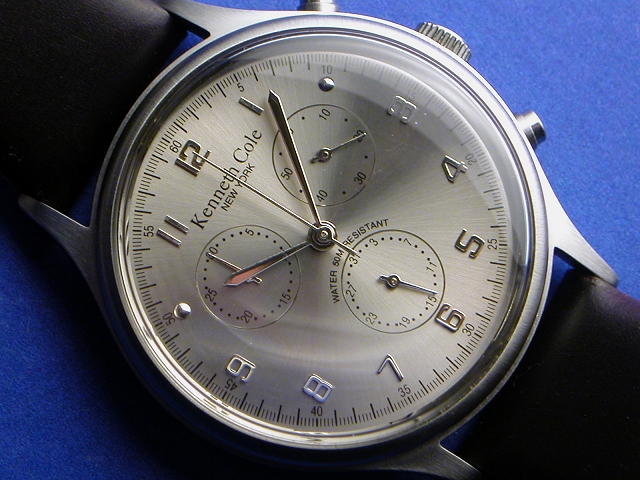
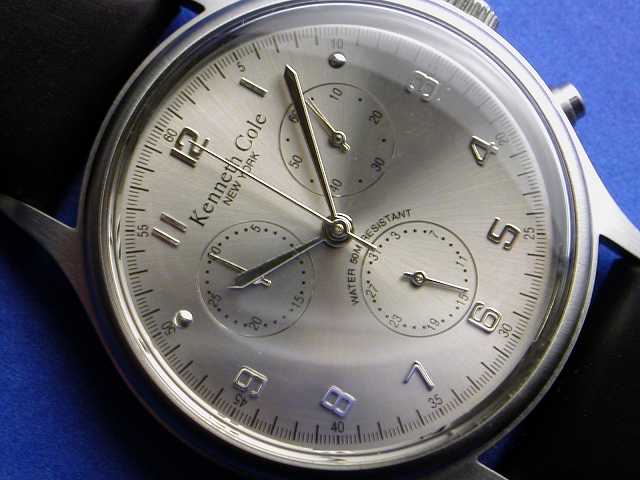
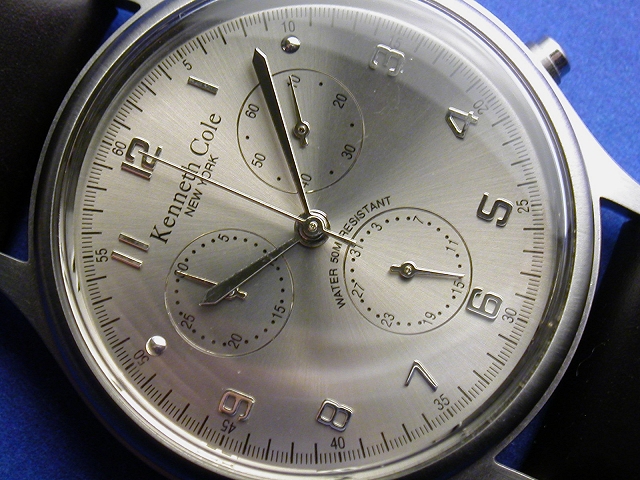
The following images show the effect of using close up lenses. The first one was taken in the Close Up mode at the minimum focusing distance. This is the maximum effect of all combinations of close up lenses. However, since white balance is not available in the close up mode, the image shows an incorrect tonality. All the other images were taken using the white balance preset, and produce a correct tonality. The second image on the first row was taken by zooming the lens all the way in and shooting at the minimum focusing distance (i.e., 23cm). As you can see from the images, the increase of the diopter value makes the minimum focusing distance shorter, and, as a result, the image of the watch gets larger. The largest one was produced by the +1, +2 and +4 close up lenses. The size of the watch is slightly smaller than that of the close up mode. You could use two +4 or other combinations to create an even larger image. However, quality may not be as good as the one obtained in the close up mode.
|
|
|
| Close Up mode | Minimum working distance (non-close up) | With +1 close up lens |
|
|
|
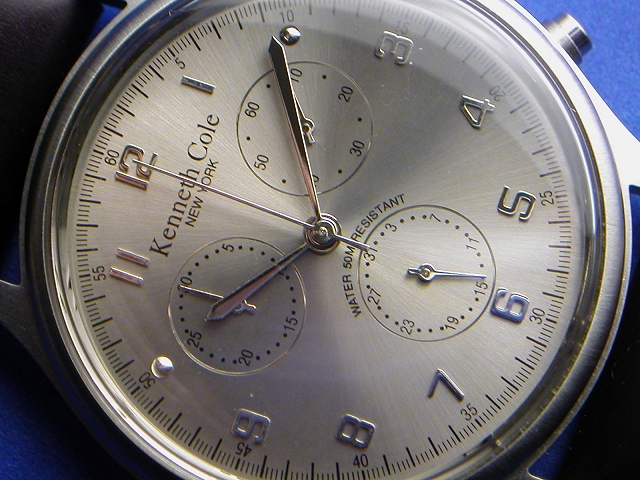
| With +2 close up lens | With +1 and +2 close up lenses | With +4 close up lens |
|
|

|
| With +1 and +4 close up lenses | With +2 and +4 close up lenses | With +1, +2 and +4 close up lenses |
| Click on the image to see a larger one | ||
When we do close up photography, how close a lens can focus is in general not the issue. More precisely, the minimum focusing distance is not the most important factor we need to know. Instead, the key issue is the magnification. What is magnification? Suppose we have a subject of length L. Take a photo of this subject at the closest distance so that its size would be the largest on the image. Let the length of this subject on the image be K. Then, the magnification of the lens at the given focal length is m = K/L. For example, if the subject is 10mm long and it is 5mm long on the image, then the magnification of lens at the given focal length is 5/10 = 0.5. If the length is 10mm (resp., 20mm) on the image, then the magnification is 10/10 = 1 (resp., 20/10=2). Normally, we do not write the magnification this way. Instead, we prefer to normalize the fraction K/L by dividing both the numerator and denominator by the smaller value of K and L, and write the result as 1:H or H:1. Let us continue with the previous example. The magnification values 5/10, 10/10 and 20/10 are converted to 1/2, 1/1 and 2/1, and rewritten as 1:2, 1:1 and 2:1, respectively. Therefore, if the magnification is 1:X, we know that the image of the subject on the image is smaller and is 1/X of the real thing. Similarly, if the magnification is 1:1, the subject and its image have the same size, which is usually referred to as life size. If the magnification is X:1, the image of the subject is X times larger than the real thing.
Why is magnification more important than minimum focusing distance in practice? In the popular 35mm photography, there are lenses with different focal lengths that can achieve the life size 1:1 magnification. For example, AF Micro Nikkor 60mm F2.8, AF Micro Nikkor 105mm F2.8, and AF Micro Nikkor 200mm F4.0 all can achieve 1:1 at their minimum focusing distances 8.8", 12" and 19.4", respectively. With a 19.4" distance, one can easily arrange for lighting and using other accessories. Therefore, in close up photography, the minimum focusing distance is not the major issue, magnification is!
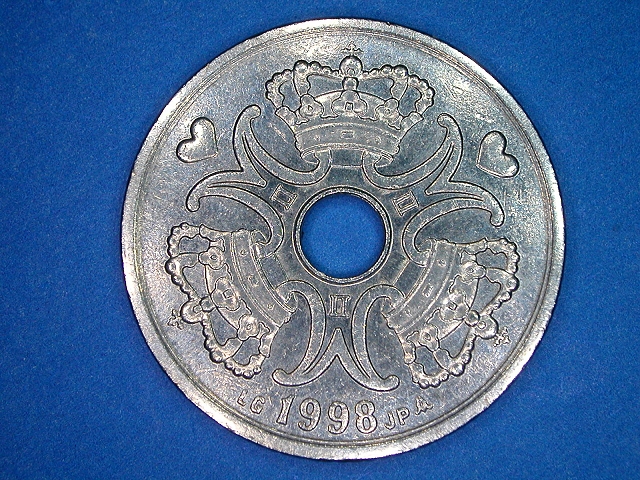
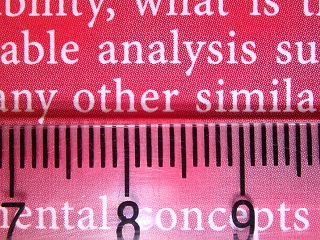
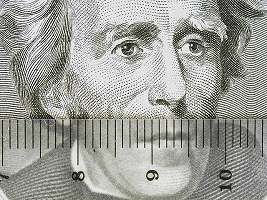
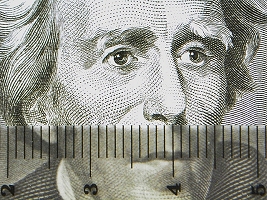
What is the magnification of the 2500 when it is in the close up mode? To determine this magnification value, we need to take the image of a subject at the minimum focusing distance as shown below. This shows that the image covers about 28mm. Since the image has an aspect ratio of 4:3, we conclude that the image covers a 28mm × 21mm area.
|
| The image size at the minimum focusing distance |
According to 2500's manual (page 103), the CCD has 2.11 million pixels. Since the area used for recording an image is 1600 × 1200 = 1.92 million, there are 190,000 pixels are not used for image recording. This is about 9 percent of the 2.11 million pixels. Therefore, only 91% of the CCD is used for image capturing. The diagonal of the CCD has a length of 6.59mm. Since the aspect ratio is 4:3, the width and height of the CCD is about 5.27mm × 3.96cm. However, since only 91% of the CCD is used for image capturing, its 91% area has width and height 5.03mm and 3.77mm, respectively. Therefore, the 28mm recorded on the image shown above has a length of about 5.03mm on the image, and the magnification is 5.03/28 = 0.180 = 1:5.6. More precisely, the length of a subject on the image is about 20% of the real thing!
To Those Technical-Minded |
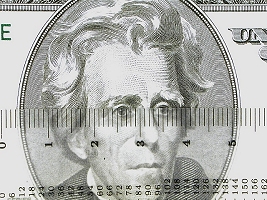
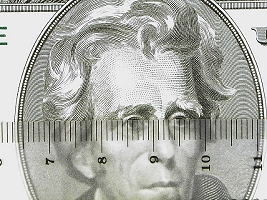
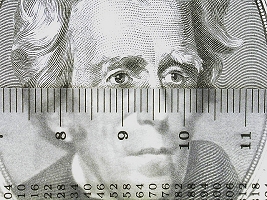
As an exercise, let us determine the magnification of various close up lenses combinations. The following shows the image of the following diopter powers: +1, +2, +3 (+1 and +2), +4, +5 (+1 and +4), +6 (+2 and +4) and +7 (+1, +2 and +4). The camera lens is zoomed all the way in with the indicated close up lens (or lenses) hand-held in front of the camera lens.

|

|
|
| +1 | +2 | +1 and +2 |
|
|
|
| +4 | +1 and +4 | +2 and +4 |
|
| +1, +2 and +4 |
The following summarizes the image length and magnification. Keep in mind that the width of the image captured by the CCD is 7.18mm. Also, please treat these data as approximation rather than exact values.
| Diopter | +1 | +2 | +3 | +4 | +5 | +6 | +7 |
| Actual Length | 86mm | 69mm | 58mm | 51mm | 43mm | 36mm | 32mm |
| Magnification | 1:17.1 | 1:13.7 | 1:11.5 | 1:10.1 | 1:8.5 | 1:7.2 | 1:6.4 |
From this table, we see that with +1, +2 and +4 diopters, we can still reach 1:6.4 magnification, which is slightly lower than that of the close up mode.