
This system allows you to design and work on a number of curves at the same time on the drawing canvas.
Design the first curve has no mystery. Just follow the procedure described in Creating Curves. To design the second and all subsequent curves, use the same procedure:
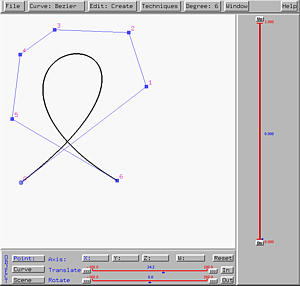
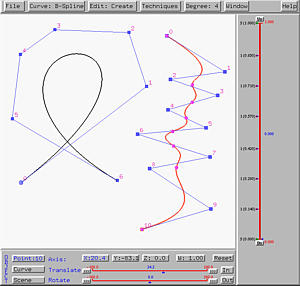
The left figure below is a Bézier curve of degree 6. Then, follow the above procedure to design a B-spline curve of degree 4. This is shown in the right figure .

Now we have more than one curves on the drawing canvas. We really need some way to select and work on one of them. This comes the concept of the current curve. The current curve is the curve you can edit and transform. If there are more than one curves on the drawing canvas, the current curve is always thicker with brighter color. When you create a new curve, that curve is the current curve. For example, in the right figure above, when the B-spline curve of degree 4 is created, it becomes the current curve.
Since only the information about the current curve (i.e., type, degree and knot vector) are shown in various buttons and sliders, you can work on the current curve only.
In the system, all curves are stored in the order they are created. Thus, given any curve, one can always find its next and previous ones. The next (i.e., previous) curve of the last (resp., first) curve is the first (resp., last) curve on the canvas. There are two ways for changing the current curve. The first one uses the menu items, while the second uses the Display & Tracing Options Window. Select Curve, followed by Next Curve Segment (resp., Previous Curve Segment) to make the next (i.e., previous) curve the current curve.
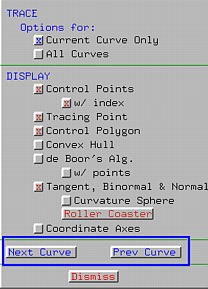
Or, you can bring up the Display & Tracing Options Window by selecting Window followed by Display & Tracing Options. Near the bottom, you should see two buttons Next Curve and Prev Curve as shown in the figure above. Clicking on the former moves to the next curve, while clicking the latter moves to the previous curve.