
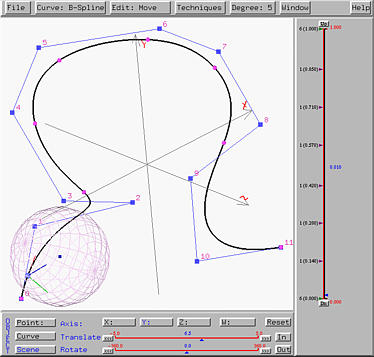
Imagine that you are sitting on a roller coaster box following the track. The track can be considered as a curve. Thus, the box moves in the direction of the tangent vector at the current position, the binormal vector points where your head points, and the normal vector points to the turning direction. More precisely, if you have a left (resp., right) turn, the normal vector points to the left (resp., right). As your box follows the track, you are sitting at the tracing point of a curve and have a ``local'' view of the world. This system can provide you with such vivid effect.
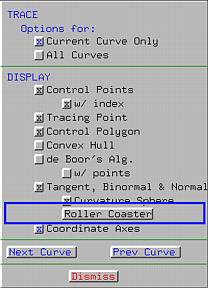
Before activate this effect, make sure that Tangent, Binormal & Normal has been activated. If you want to see the curvature sphere, you can also activate Curvature Sphere. Then, click on Roller Coaster to activate the roller coaster effect.
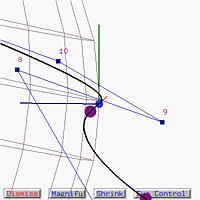
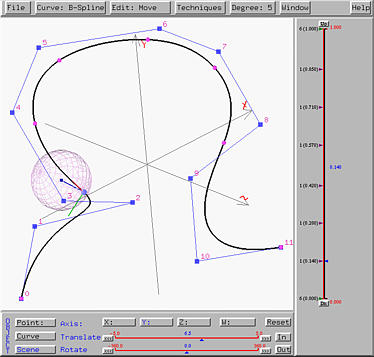
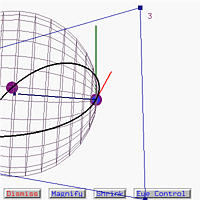
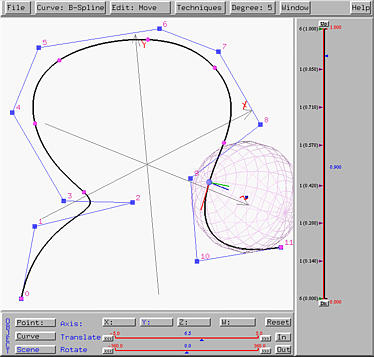
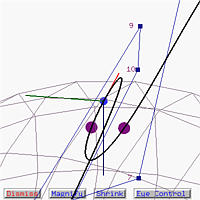
In the following, we still use file space-curve-1.dat as our working example. Click here to download a copy. After clicking on Roller Coaster, the Roller Coaster Window appears. It shows the curve, the tracing point, and the moving triad. The eye position can be modified to obtain a better view. We shall return to this later on. The left figure below shows the tracing point at the beginning of the curve. The roller coaster window also depicts the same. We can actually see control point 0 behind the tracing point.

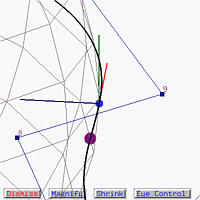
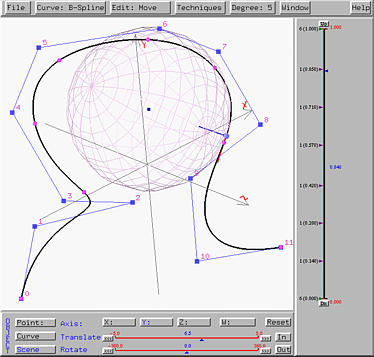
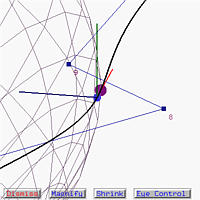
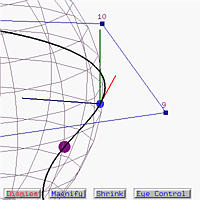
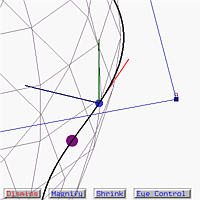
Let us move the tracing point further entering a sharp turn. Now we can see control point 3 in front of the tracing point; but our position is somewhat up-side-down because the binormal vector (the green one) points downward. However, since the binormal vector points to where our head is pointing, even though the curve goes up, the roller coaster window shows a down turn. This matches our roller coaster experience.
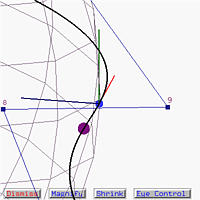
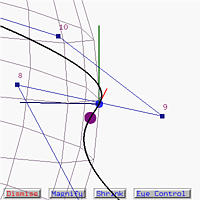
Let us move forward to a place just before entering an inflection point as mentioned in the Curvature Sphere page. From the roller coaster window, it is clear that the curve is about to change its turning direction.
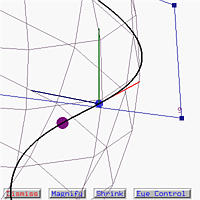
The following figures show the result after passing the inflection point. Please notice that the curvature sphere changes sides as well.
It may be difficult for you to extrapolate your roller coaster experience on a screen. But, going around the curve a few more times and, if it is necessary, do some scene rotations, you will be able to see and learn more about the effect of moving triad and curvature, and gain some visual experience of how curve turns!

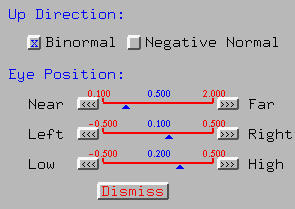
There are two buttons for choosing the up direction. It is either based on the binormal vector or the negative normal vector. Normally, since the binormal vector points to the head direction, the up direction, by default, is the binormal direction. For interesting effect, one can choose the negative direction so that you would get an interesting viewing effect. Click on button Binormal (resp., Negative Normal) to use the binormal (resp., the negative normal) direction as the up direction. The left figure blow is the normal case, the up direction being the binormal direction, while the right one uses the negative normal direction as the up direction.
There are three sliders for modifying the eye position. Please note that wherever the position, the passenger always look at the tracing point. In the following, we use the binormal vector as the up direction. We can move closer to or farther away from the tracing point with the Near/Far slider. The default value is 0.2. The left figure below shows moving closer to the tracing point (0.25), while the right one shows moving away from the tracing point (1.0).
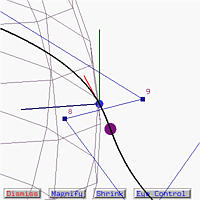
We can also use the Left/Right slider to move to the left or right. The default value is that the view position is slightly shift to the right side at a value of 0.1. If we move to the left to -0.1, we are in the ``left'' side of the curve. This is shown in the left figure below. The right one shows the effect of moving to the right side of the curve at 0.25.
Use the Low/High slider to move up and down. The default value is 0.2, meaning that the viewing position is slightly above the floor of the roller coaster box. The left figure below shows a value of 0.05, which is near to the floor of the roller coaster box and as a result the tangent vector can barely be seen. The right figure shows the effect of moving up to 0.5, which is high above the floor.