Camera Setup

After attaching the AS-E900 adapter, turn the flash to the
ON position and set the flash
mode to TTL.
The flash should not be set to the stand-by mode
(i.e., STBY); otherwise, it may
turn off unexpectedly. If it is possible, the illumination angle
should be set to 28mm or wider.
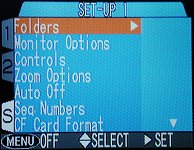
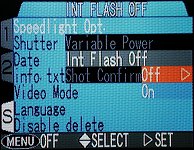
You have two choices. You can either allow both the external flash and internal
flash to fire. Or, you can turn off the internal flash and only use the
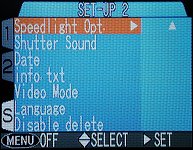
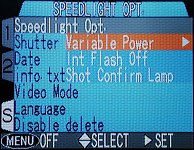
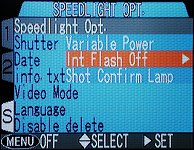
external one. To turn off (i.e., disable) the internal flash,
follow the procedure below:
To enable the internal flash, follow the above procedure to select the
Off option.
| Do forget to raise the internal
flash in order to use the external one.
|
External Flash Settings
Similar to the internal flash, there are four different external flash settings
available. Each flash setting is indicated by a pair of icons shown on both
the control panel and LCD monitor. The meaning of each flash setting is shown
in the table below. Please note that the internal flash icon
(i.e., the right icon of the two) means
Flash Cancel because it is
turned off. If the internal flash is not turned off, the icons shown on the
control panel and LCD monitor display only the status of the internal flash.
The four external flash modes are:
| Icon |
Meaning |
| Ctrl Panel |
LCD |

|

|
The Auto mode.
When illumination is poor, the external flash fires
automatically.
|

|

|
The Auto with Red-Eye
Reduction mode. Activate the
Red-Eye Reduction
mode.
|

|

|
The Anytime Flash
or Fill Flash mode.
Force the external flash to fire. This is useful for fill flash.
|

|

|
The Slow
Synchronization mode.
Activates the
Slow Synchronization
capability of the external flash.
|
Please continue with the
next page.